Complete Guide to Proxmox VE: Clustering, HA & Live Migration
In the world of open-source virtualization, Proxmox VE stands out as a powerful alternative to VMware. This guide walks you through building a complete Proxmox Lab, from setting up the infrastructure (Windows Server & iSCSI) to configuring Clustering, High Availability (HA), and performing Live Migrations.
💡 Technical Glossary:
- Proxmox VE: An open-source server management platform for enterprise virtualization (combines KVM hypervisor and LXC containers).
- iSCSI (Internet Small Computer Systems Interface): A standard that allows connecting storage devices over a network.
- LVM (Logical Volume Manager): A system of managing logical volumes for the Linux kernel, allowing flexible hard drive resizing.
- HA (High Availability): A feature that automatically restarts VMs on another node if the current host fails.
1. Environment Setup & Information
Before diving into the configuration, here is the network topology and IP allocation for our lab environment:
2. Infrastructure Configuration (Windows Server & iSCSI)
Step 1: Configure Windows Server VM
First, we set up the Windows Server which will act as our Storage Server (iSCSI Target) and Domain Controller.
Memory: 2GB
Processors: 2
Hard Disk: 100GB
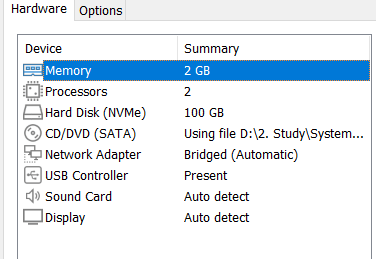
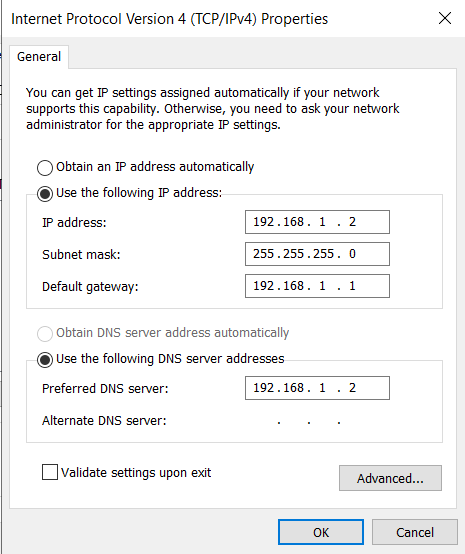
Network Configuration: Set a static IP for the server.
Subnet Mask: 255.255.255.0
Default Gateway: 192.168.1.1
DNS: 192.168.1.2
Step 2: Install iSCSI Target Service
To provide shared storage for the Proxmox cluster, we need to install the iSCSI Target Server role.
Go to Server Manager > Add Roles and Features > File and Storage Services > Select File and iSCSI Services > Install.

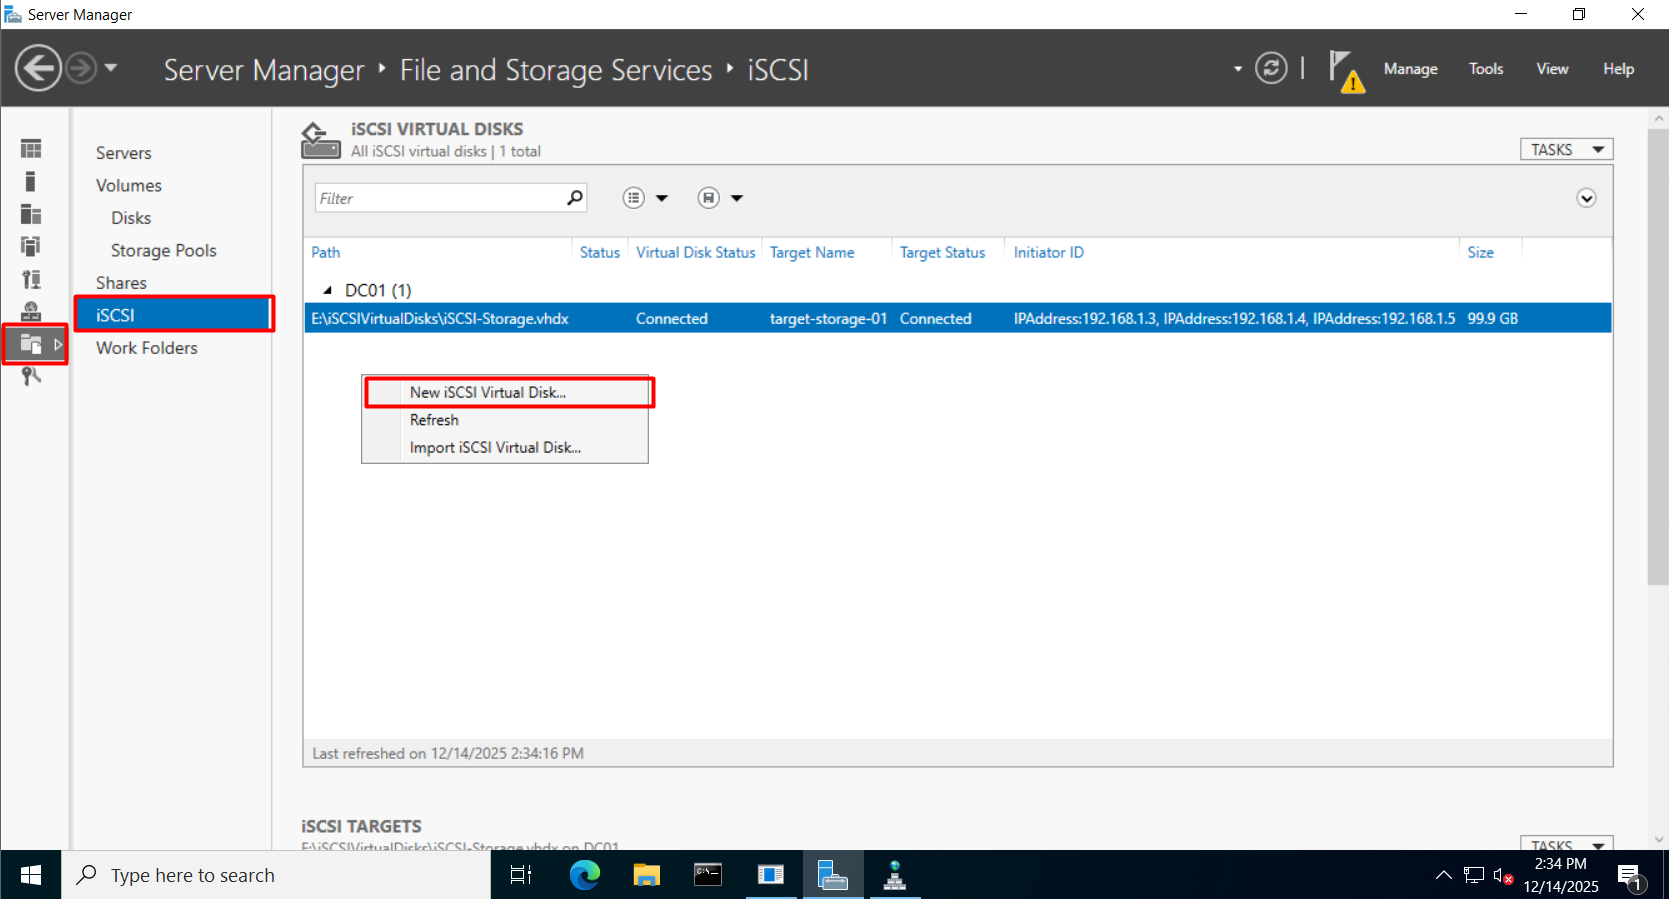
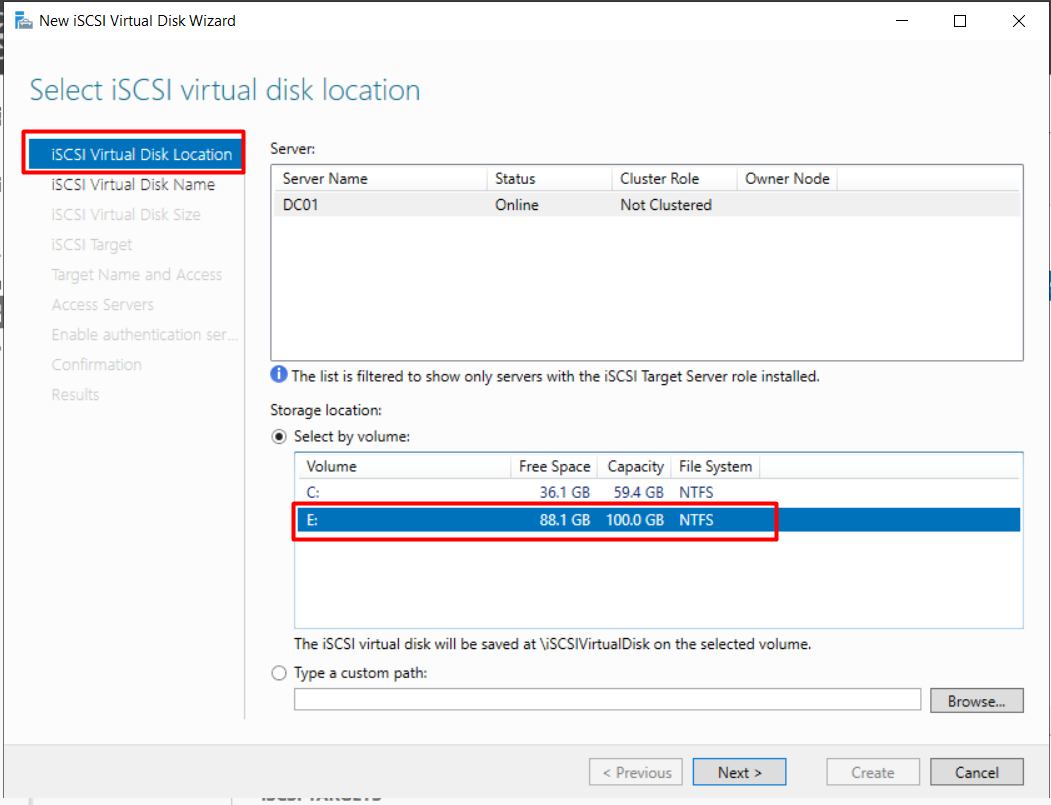
Step 3: Create iSCSI Virtual Disks
-
- Open File and Storage Services > iSCSI > Click New iSCSI Virtual Disk.
-
- Select Storage Location: Choose the volume to host the iSCSI disk.
-
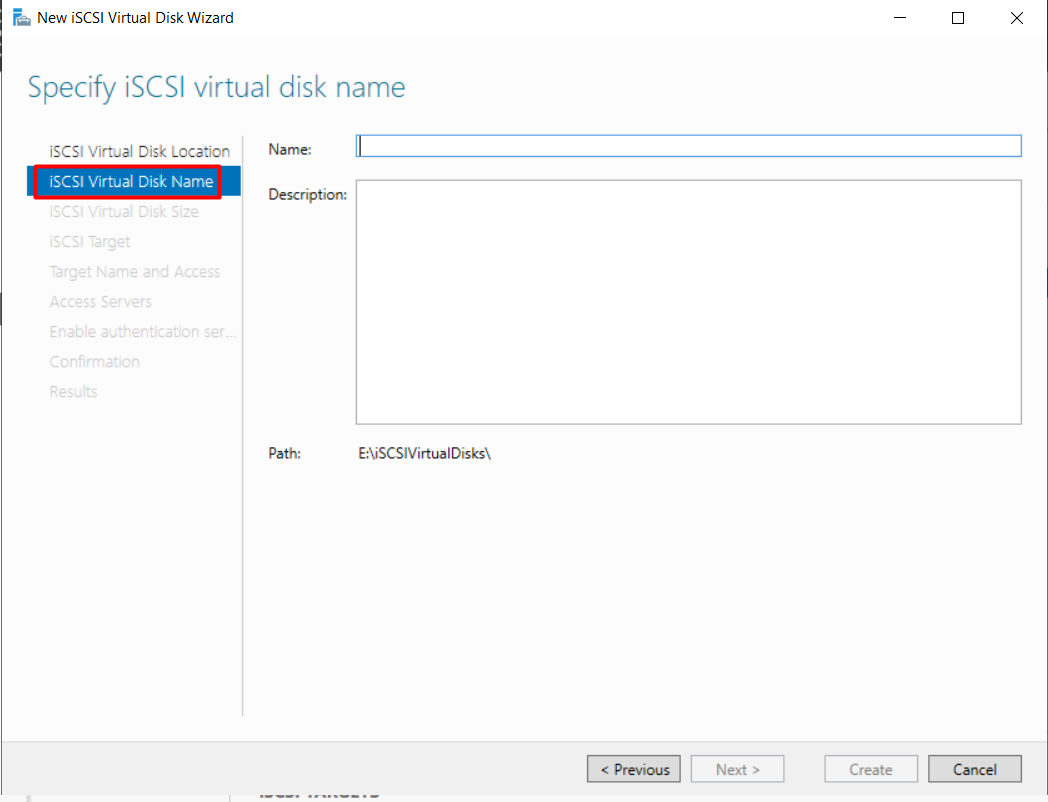
- Name the Disk: Input a name and description.
-
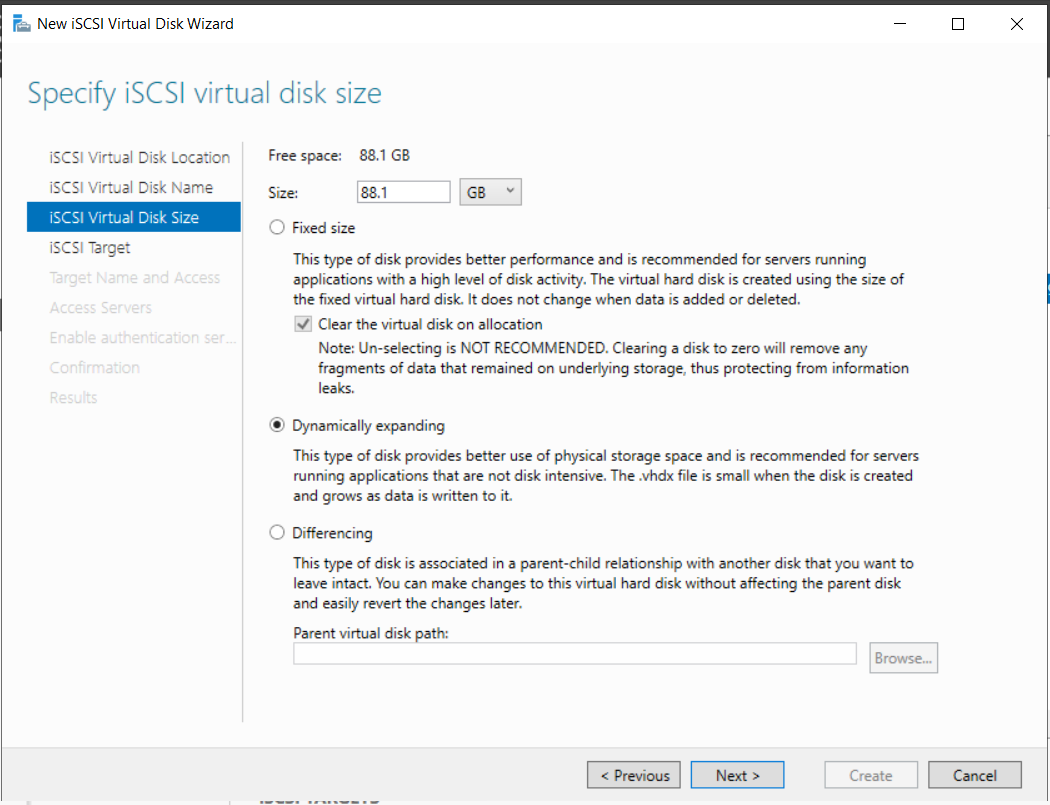
- Specify Size: Select Dynamically expanding to save space.
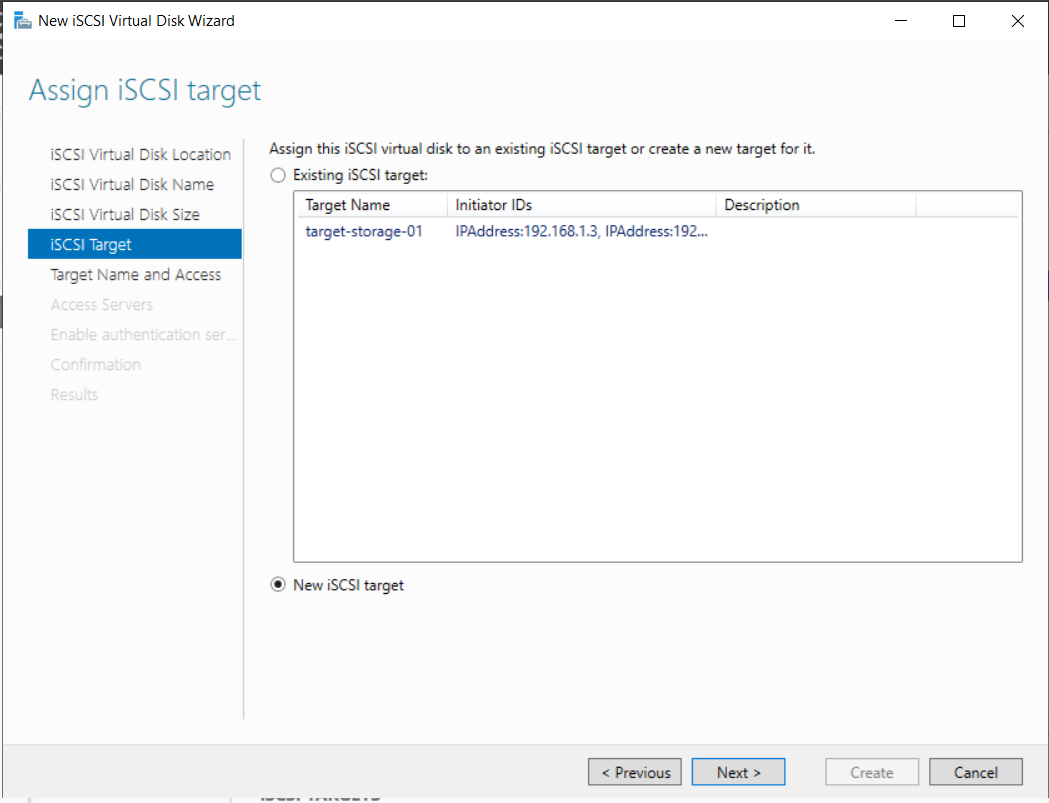
Step 4: Configure iSCSI Targets
We need to allow our Proxmox hosts (IPs ending in .7, .8, .11) to access this storage.
Select New iSCSI Target. Then, click Add and specify the IP Address of each Proxmox host.
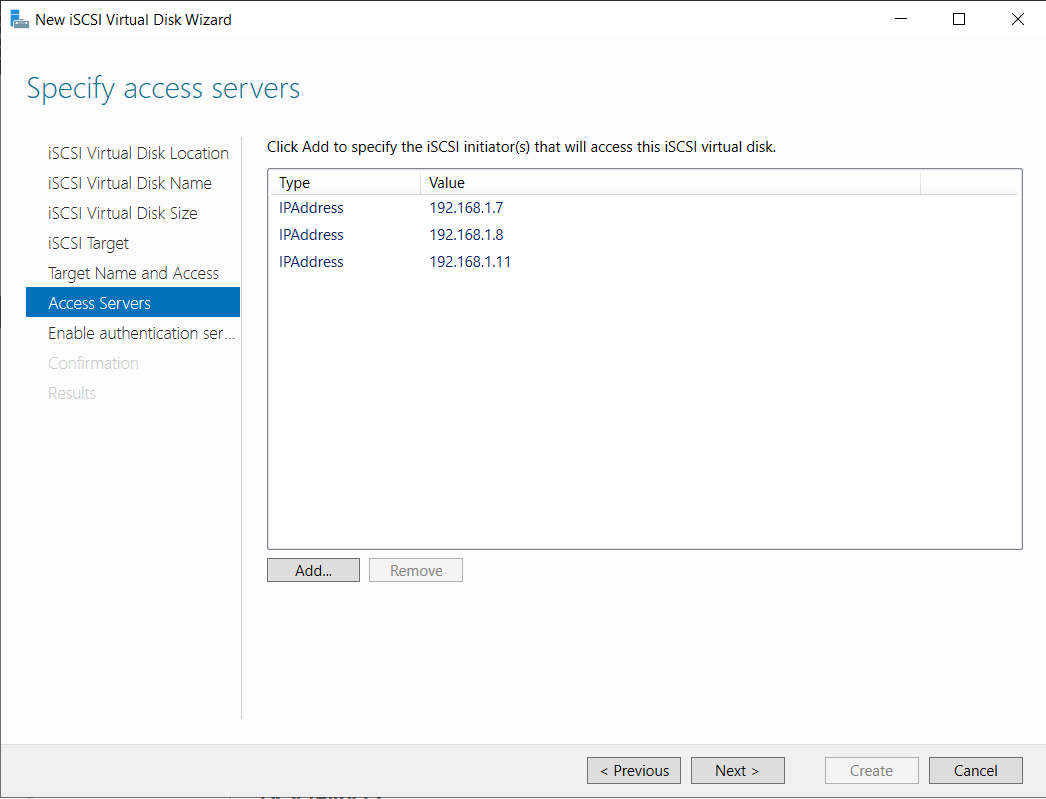
Repeat for all 3 Proxmox nodes until the list is complete:
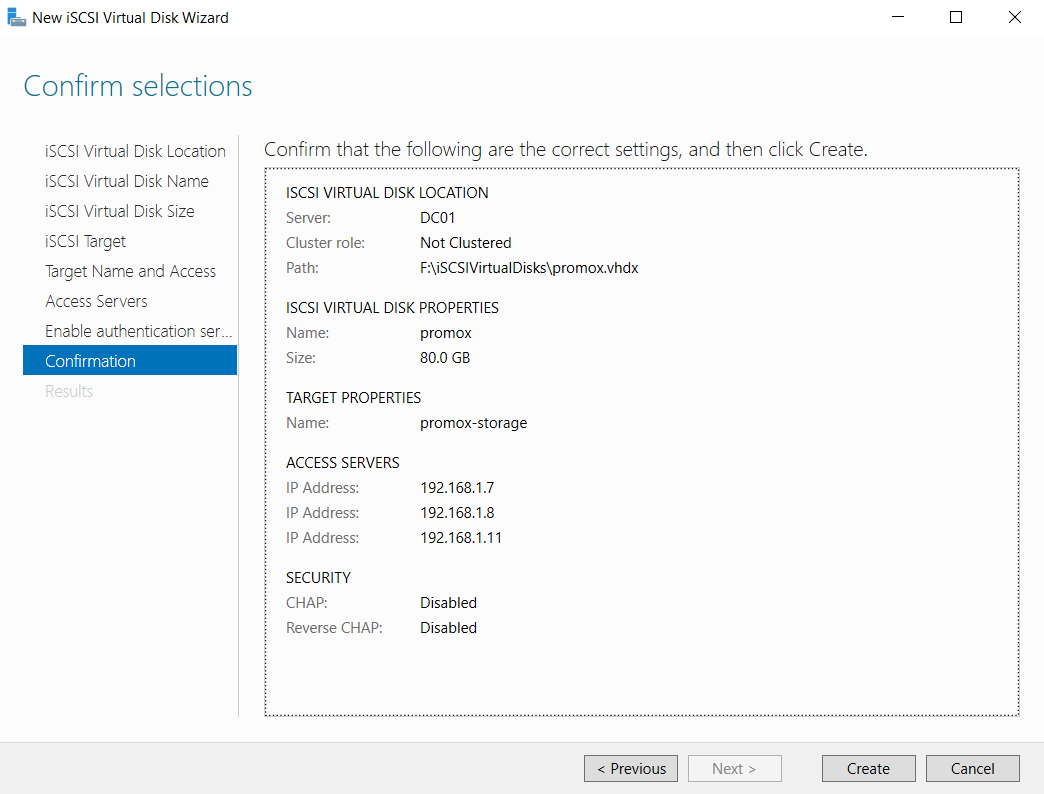
Finally, enable authentication (if needed) and click Create.
3. Deploy Proxmox Proxmox
Step-by-Step Guide: Installing a 3-Node Proxmox Cluster
In this post, I will document the exact configuration used to set up three separate Proxmox VE nodes. We will be configuring proxmox-01, proxmox-02, and proxmox-03 with static IP addresses to prepare them for clustering.
Below are the detailed summary settings for each machine.
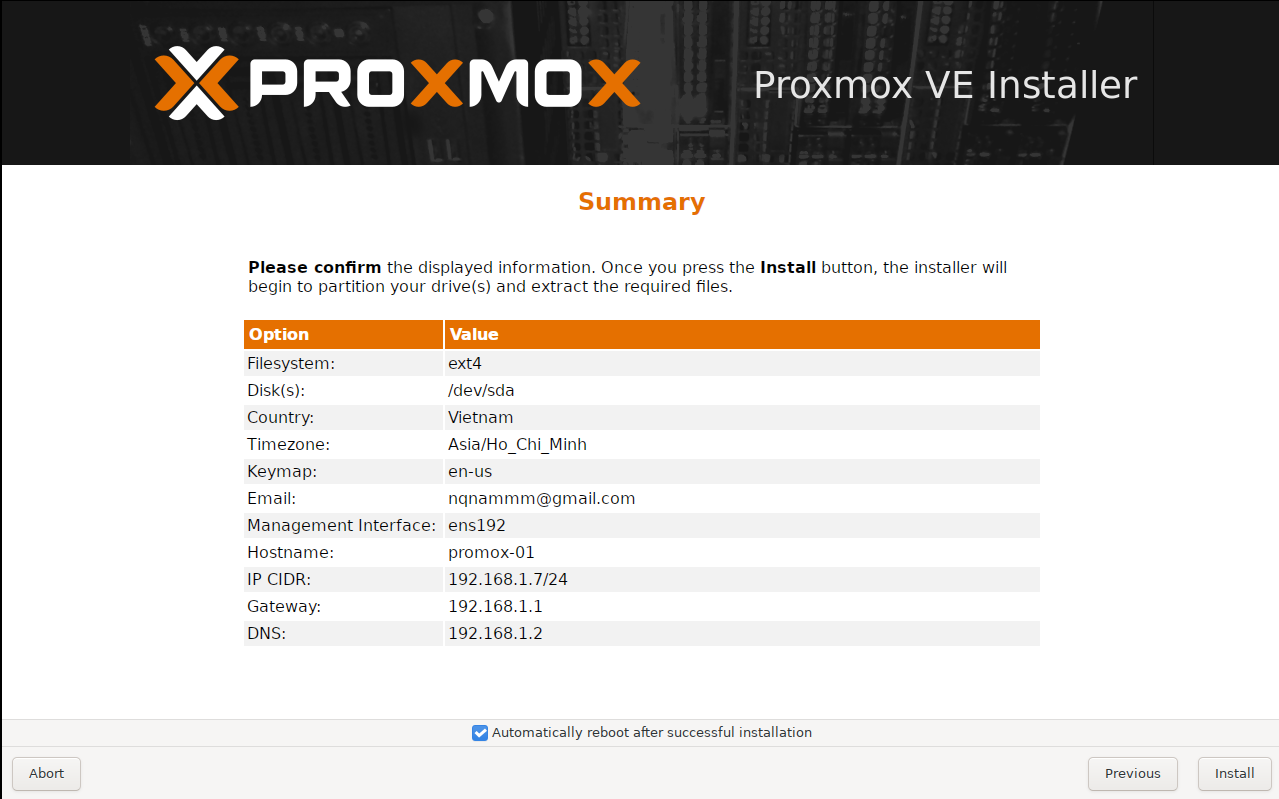
Machine 1: The First Node (proxmox-01)
We start by configuring the first server. This node acts as the initial point of our cluster. We are assigning it the IP address ending in .7.
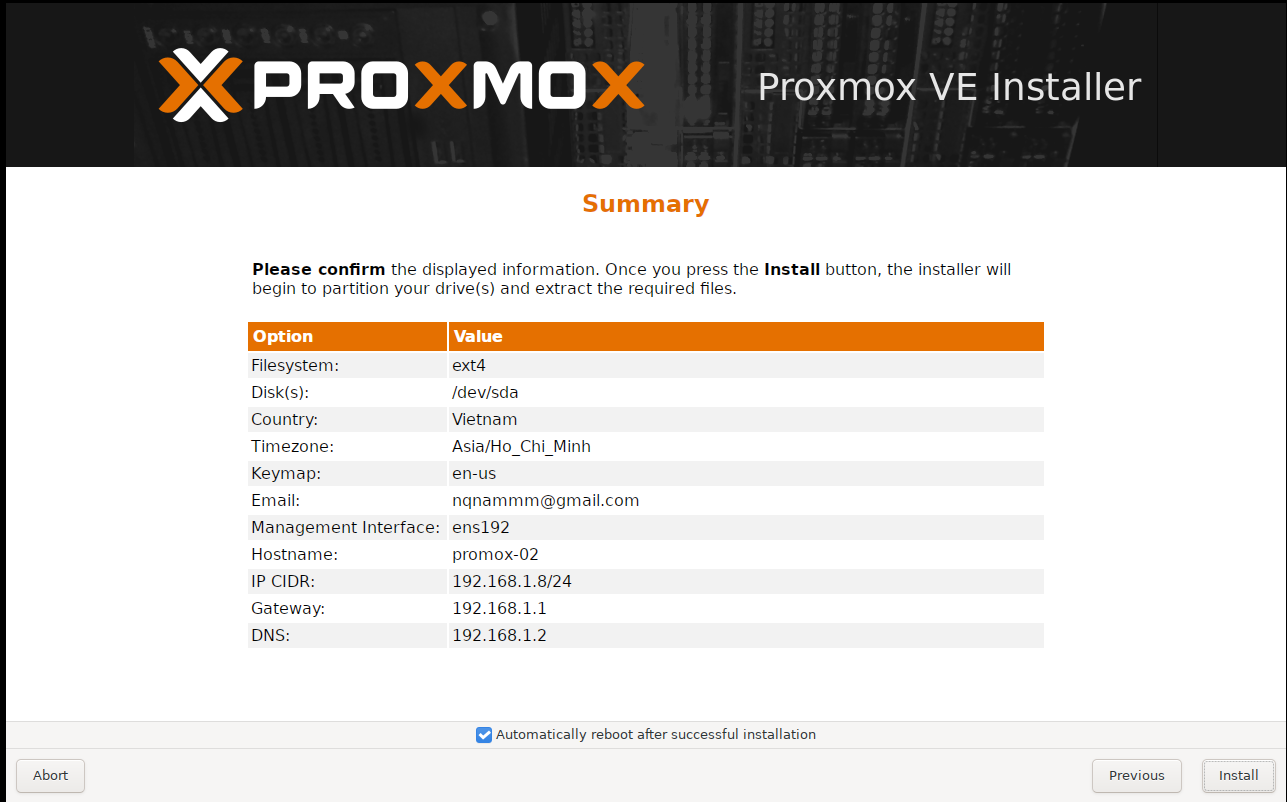
Machine 2: The Second Node (proxmox-02)
For the second server, we follow the same geographical and network gateway settings, but we assign the next available IP address .8.
Machine 3: The Third Node (proxmox-03)
Finally, we configure the third node. Note that for this specific setup, we are skipping a few IPs and assigning it to .11.

4. Storage Configuration on Proxmox
Once the Windows Server storage is ready, we need to mount it on Proxmox to use as Shared Storage.
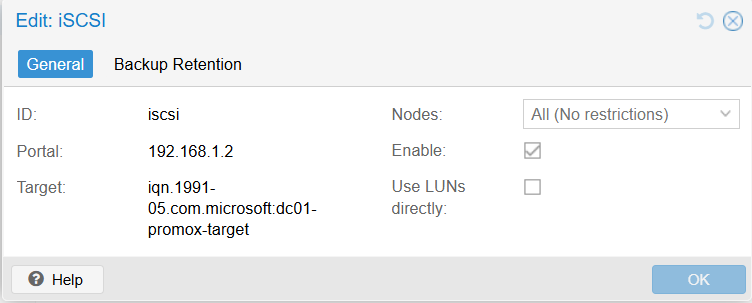
1. Add iSCSI Storage
Navigate to Datacenter > Storage > Add > iSCSI.
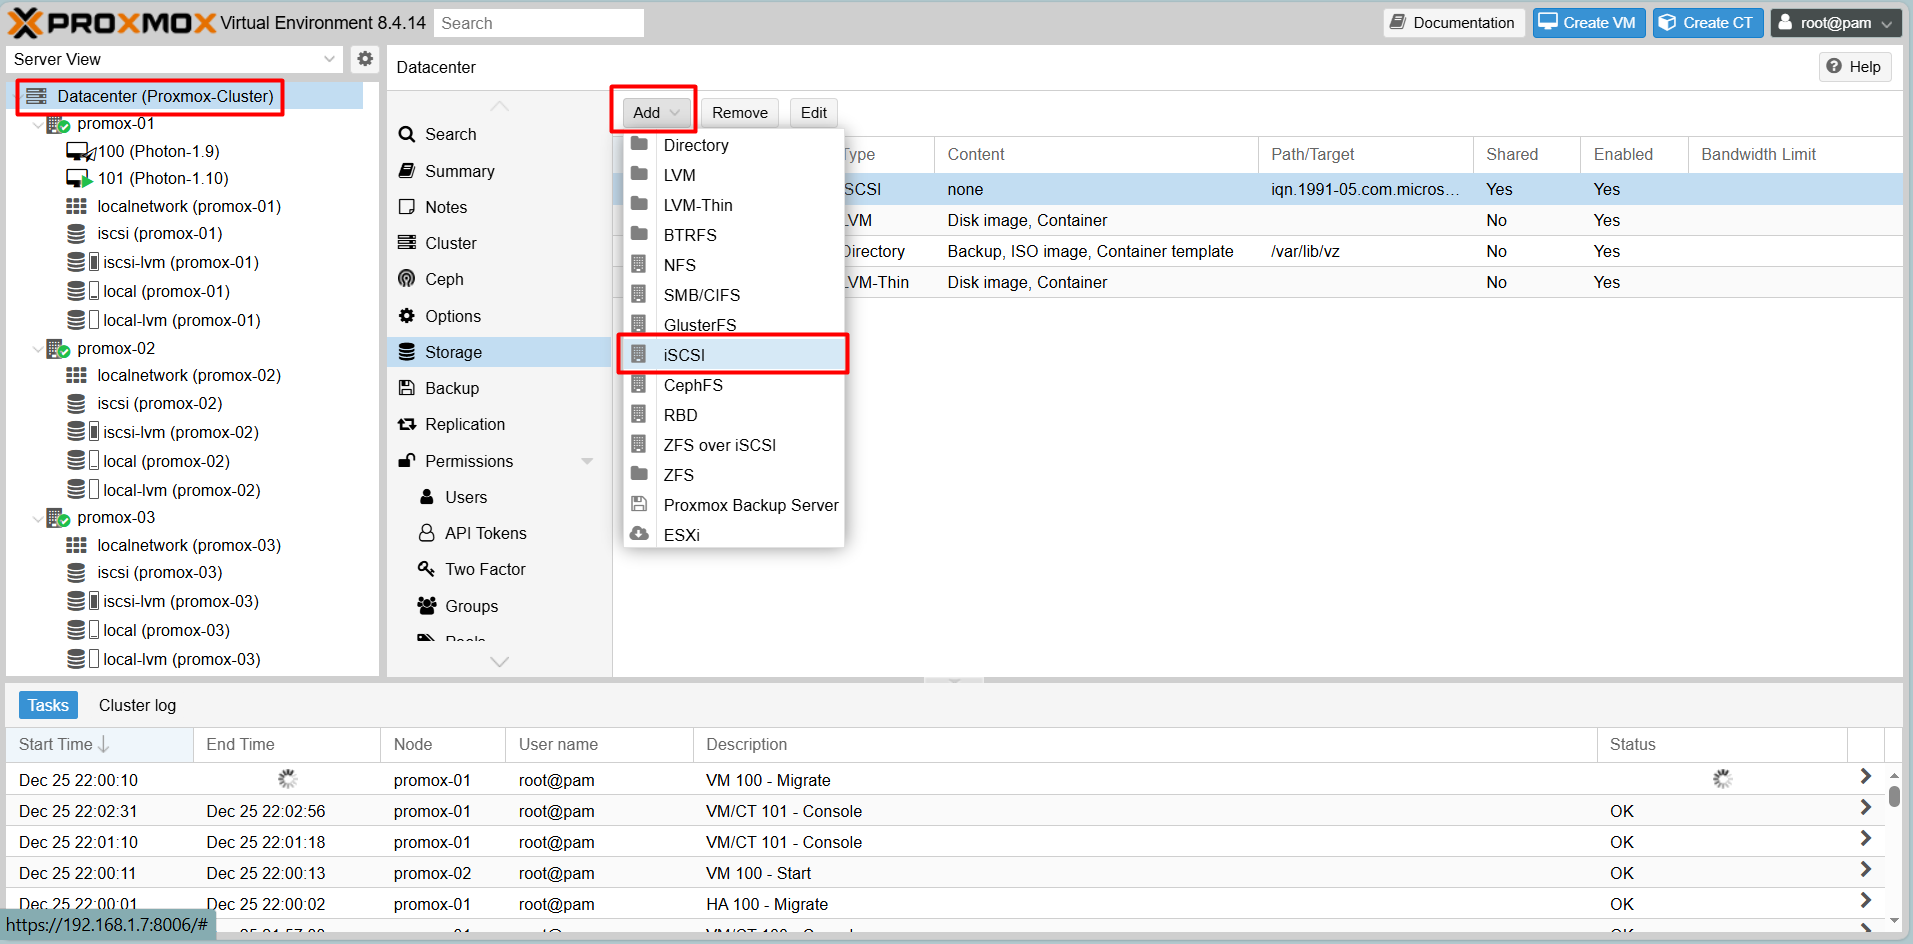
- ID: iSCSI
- Portal: 192.168.1.2 (Address of Windows Server)
- Tip: Uncheck “Use LUNs directly”.
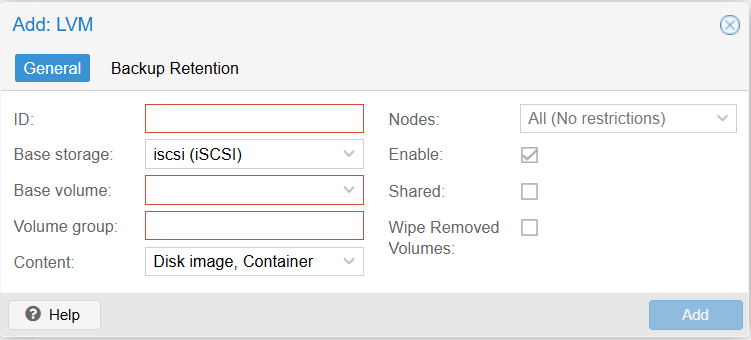
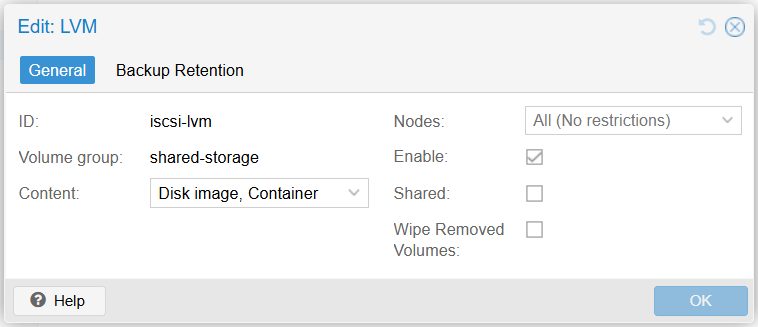
2. Create LVM on top of iSCSI
To store VM disk images effectively, we layer LVM on top of the iSCSI connection.
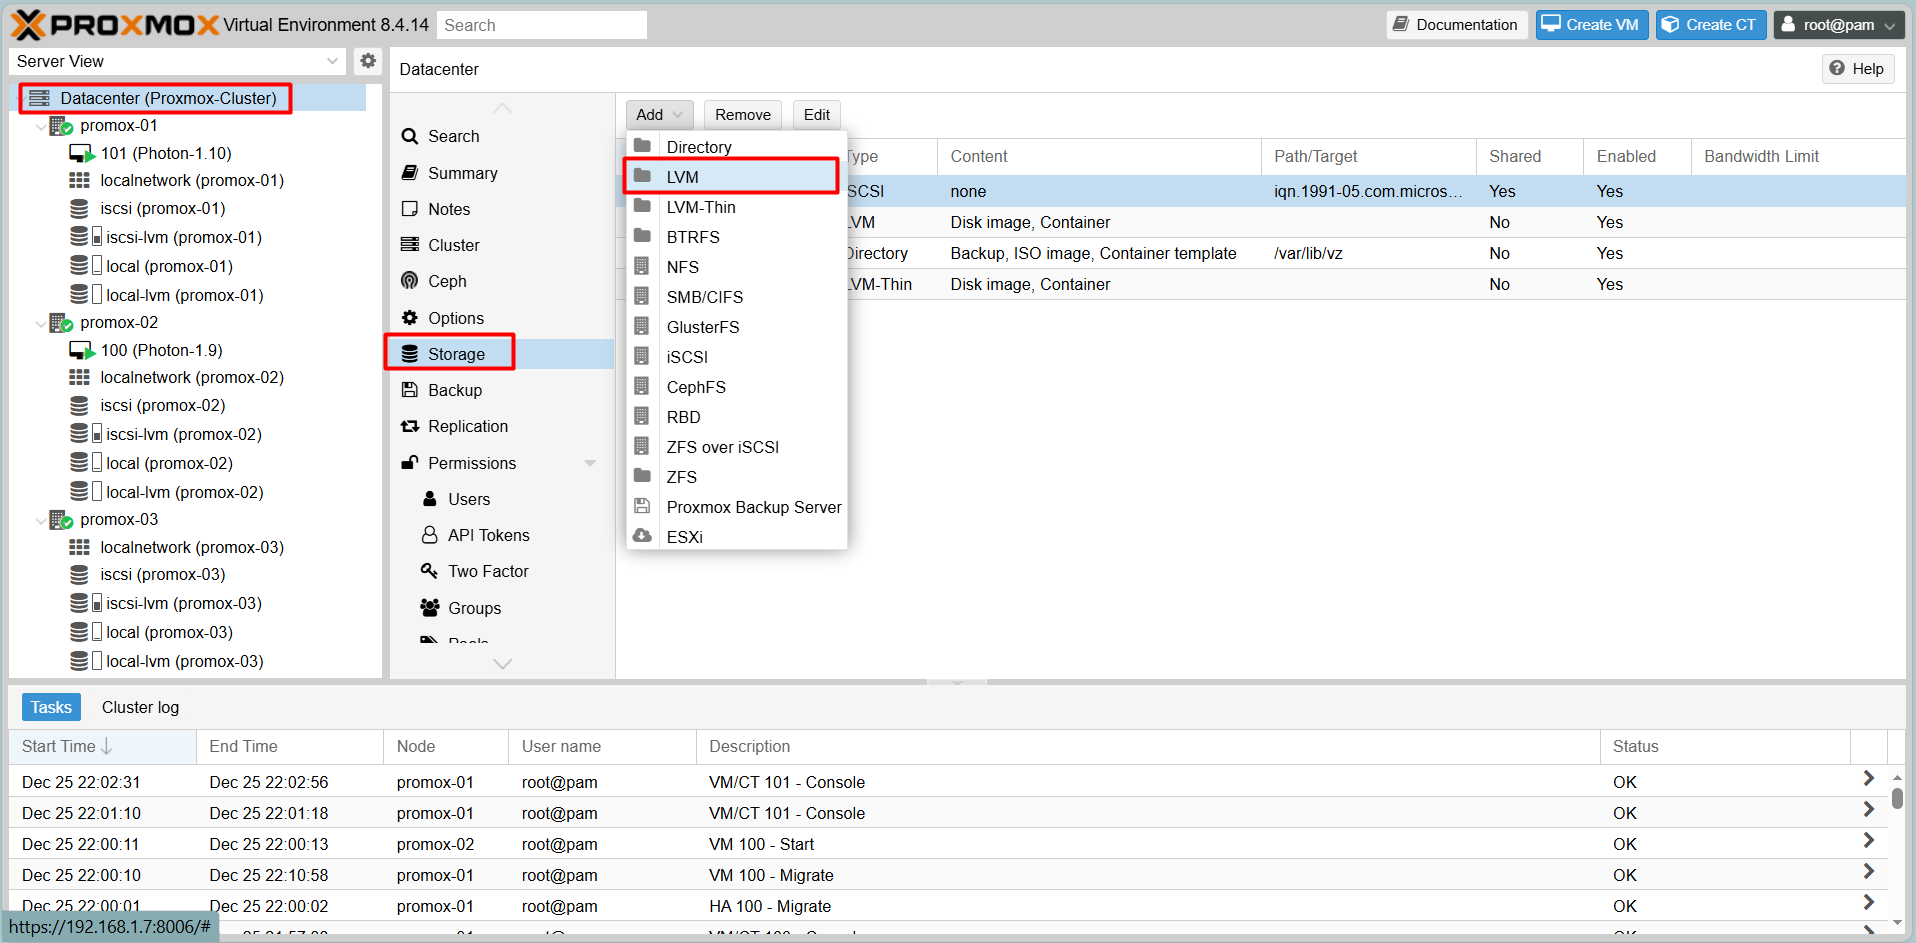
Go to Datacenter > Add > LVM.
- ID: iscsi-lvm
- Base storage: Choose the iSCSI storage added in the previous step.
- Base volume: Select the LUN provided by Windows Server.
- Volume group: Check the volume box.
Result
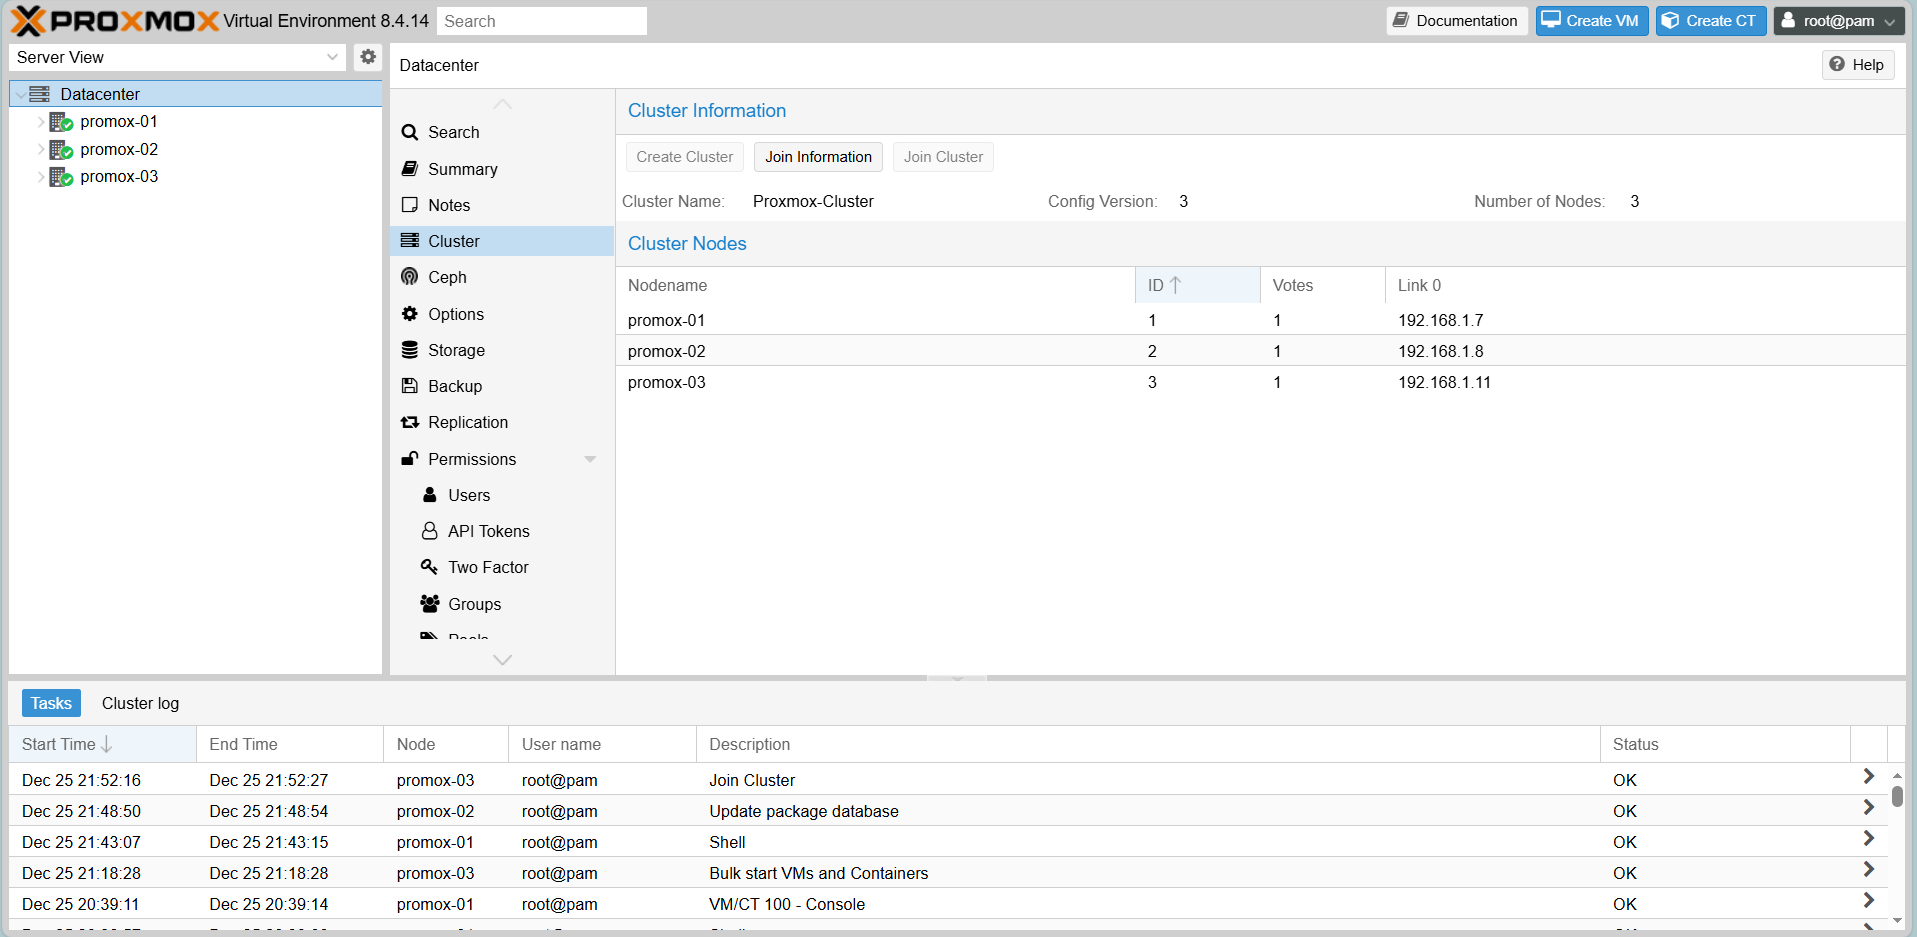
5. Proxmox Cluster Deployment
Clustering allows centralized management and enables High Availability features.
Step 1: Create Cluster (On Node 1)
On Proxmox-01, go to Datacenter > Cluster > Create Cluster.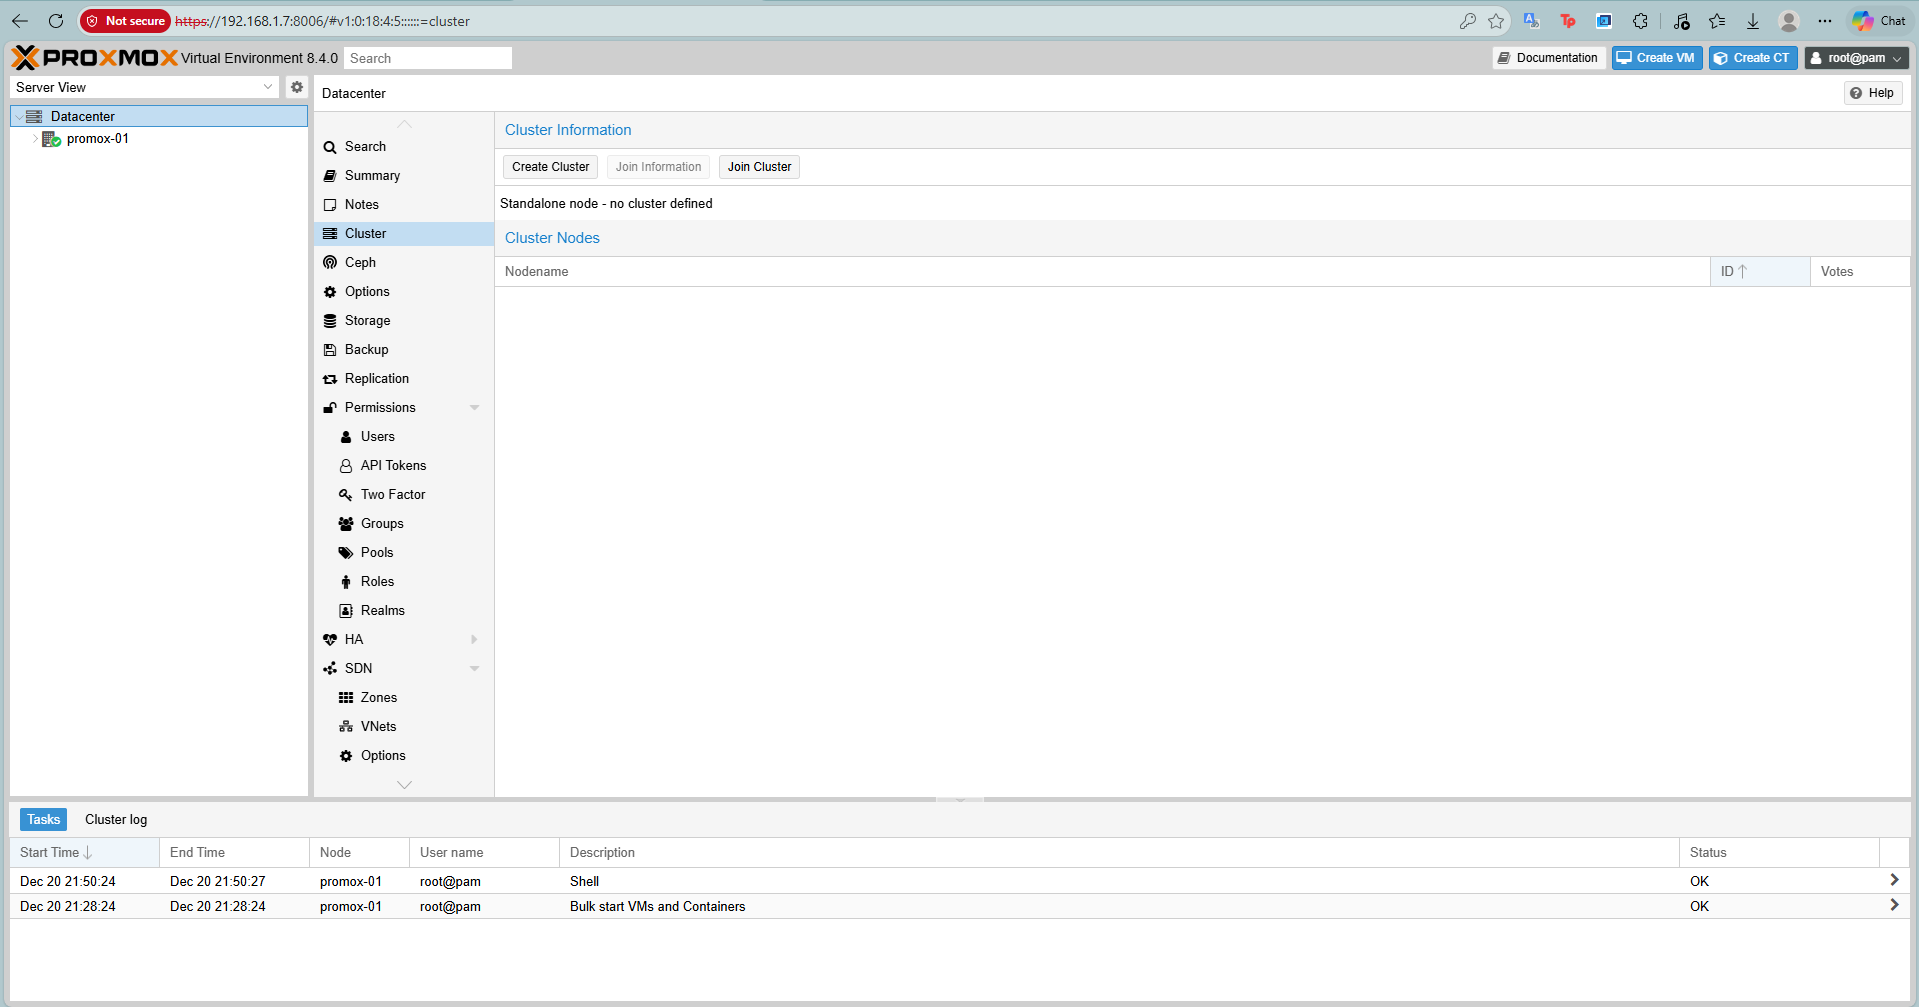
Give it a name, e.g., Proxmox-Cluster.
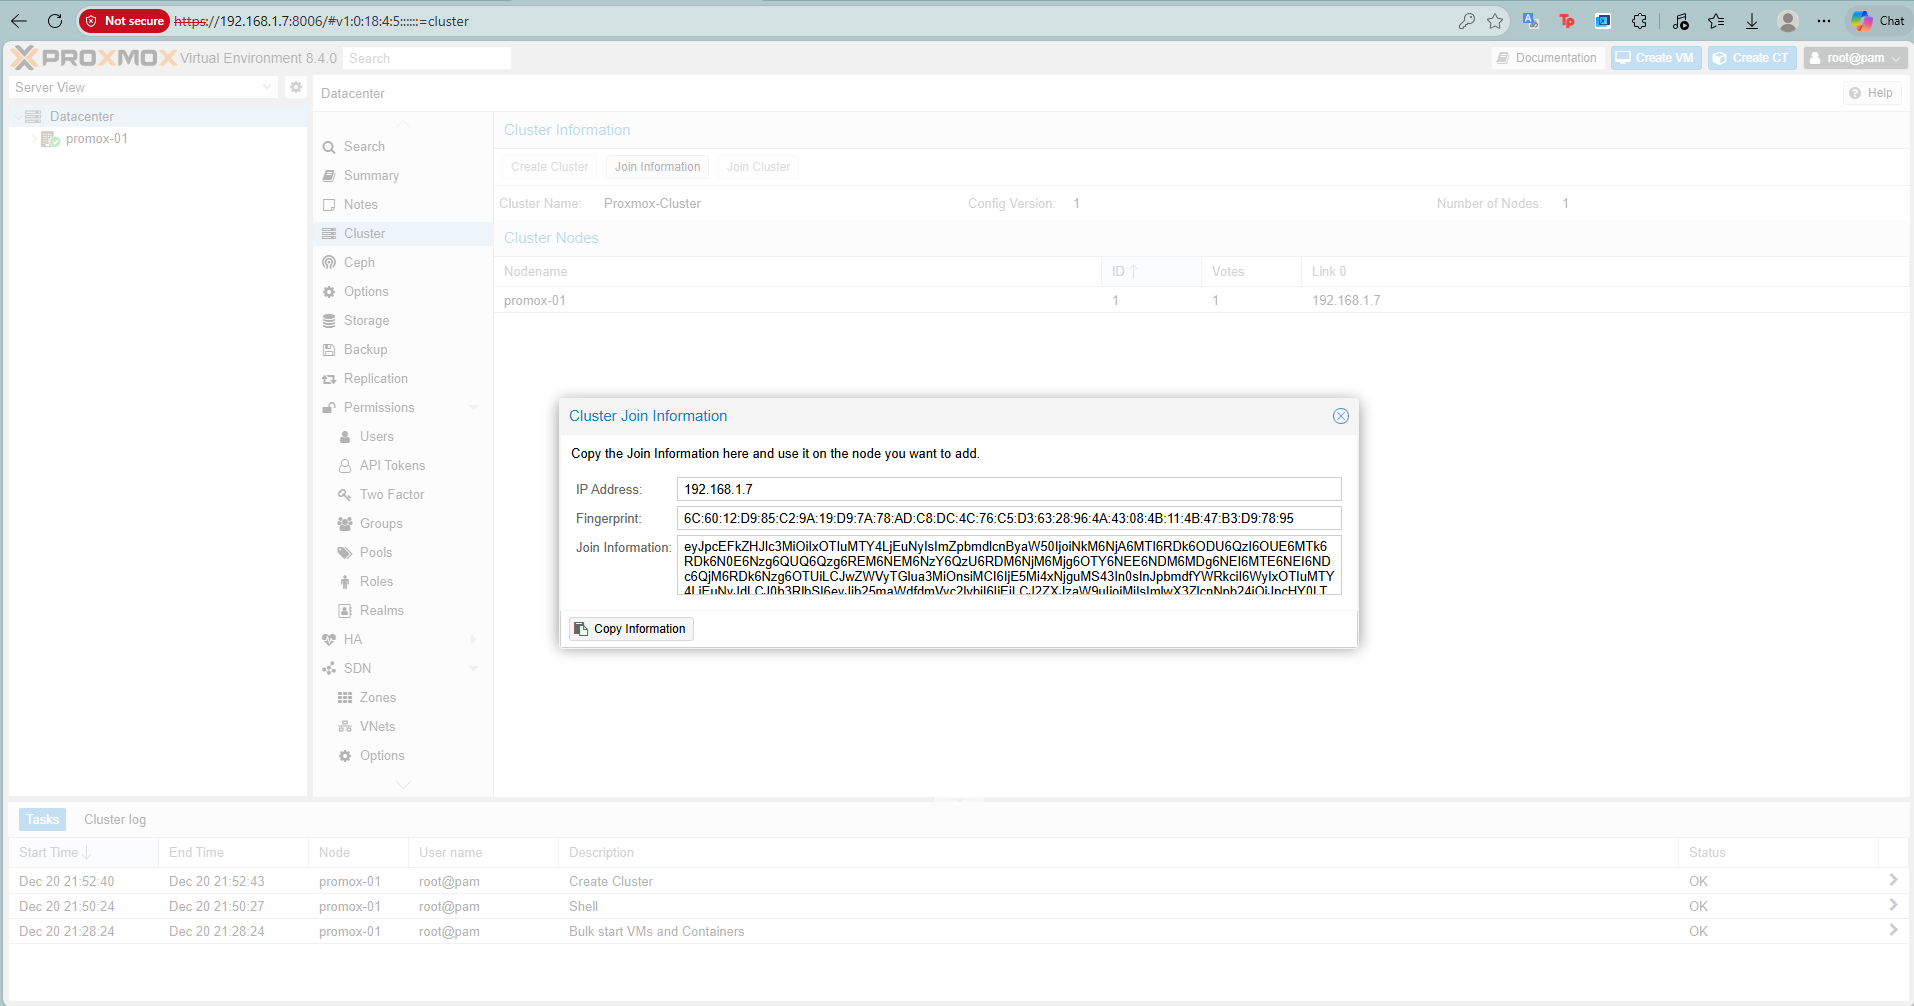
Result
Once created, click Join Information and Copy Information string.
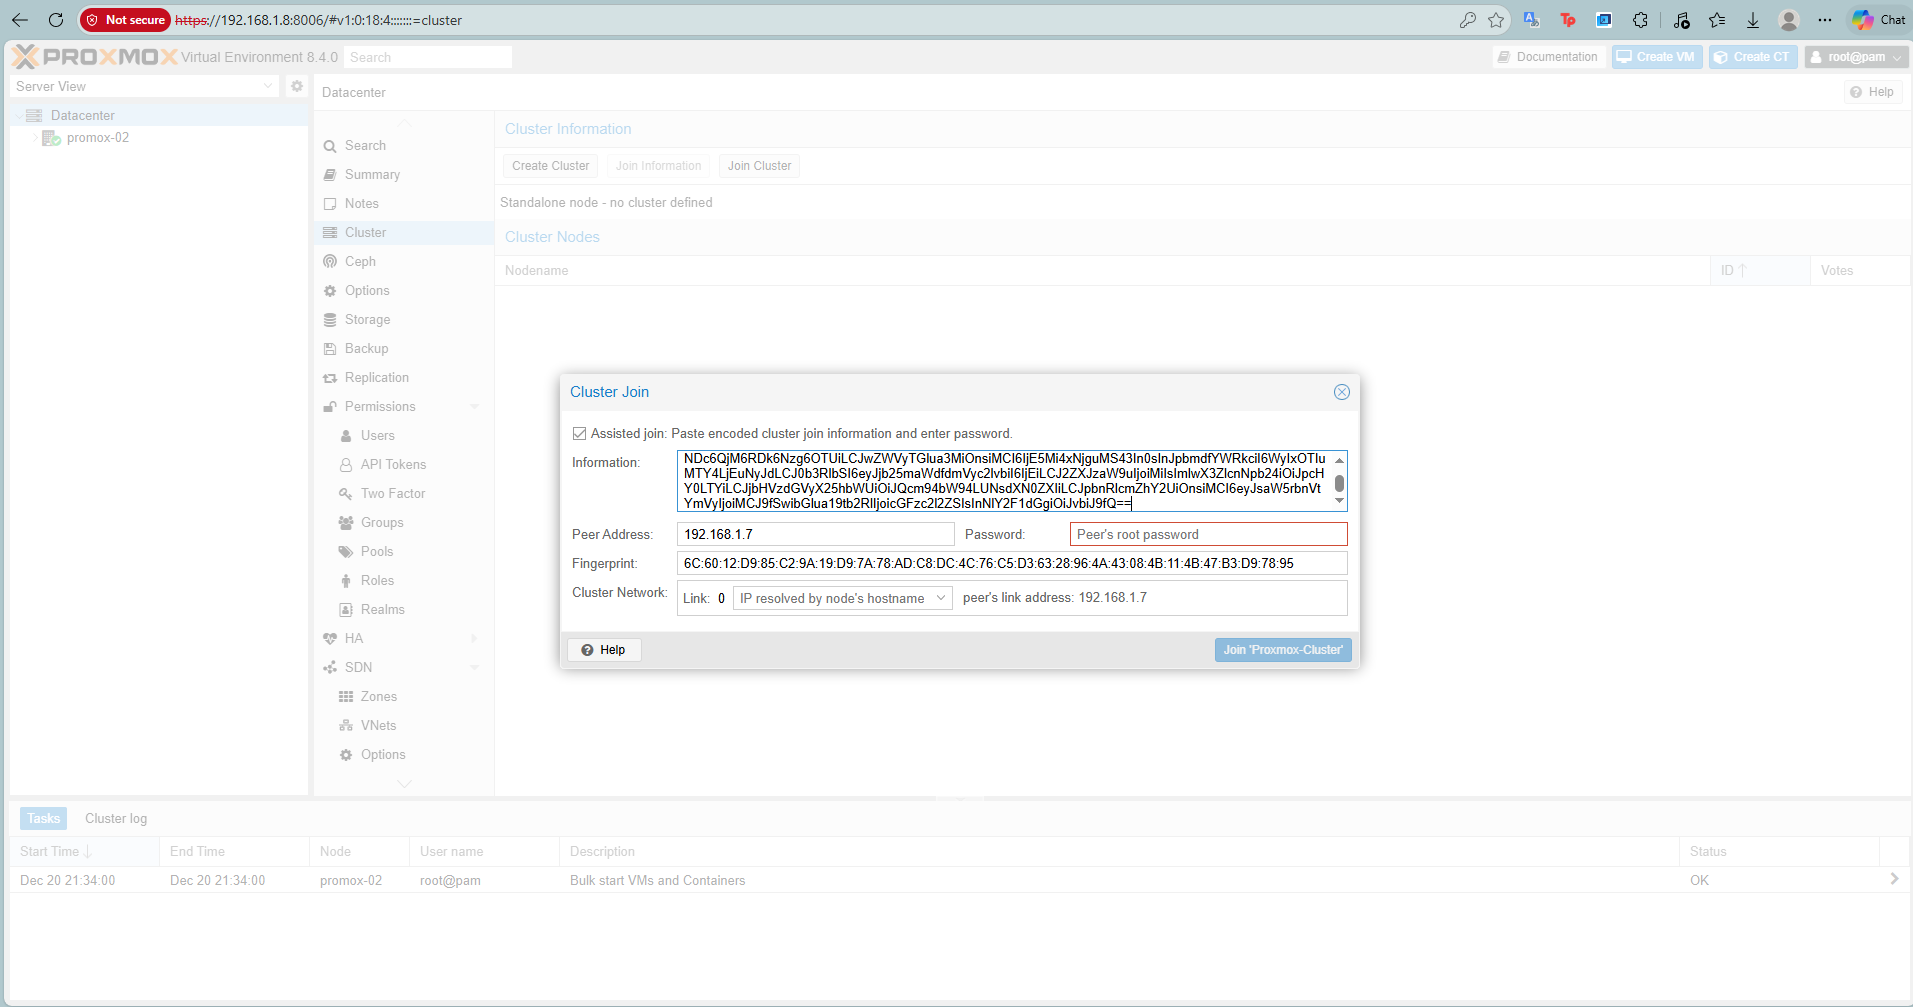
Step 2: Join Nodes (On Node 2 & 3)
Log in to Proxmox-02 (and later Proxmox-03):
-
- Select Datacenter > Cluster.
- Click Join Cluster.

-
- Paste the Join Information copied from Node 1.
- Enter the root password of Node 1 and click Join.
After joining all nodes, your Datacenter view will show all 3 nodes online.
6. Validating HA & Live Migration
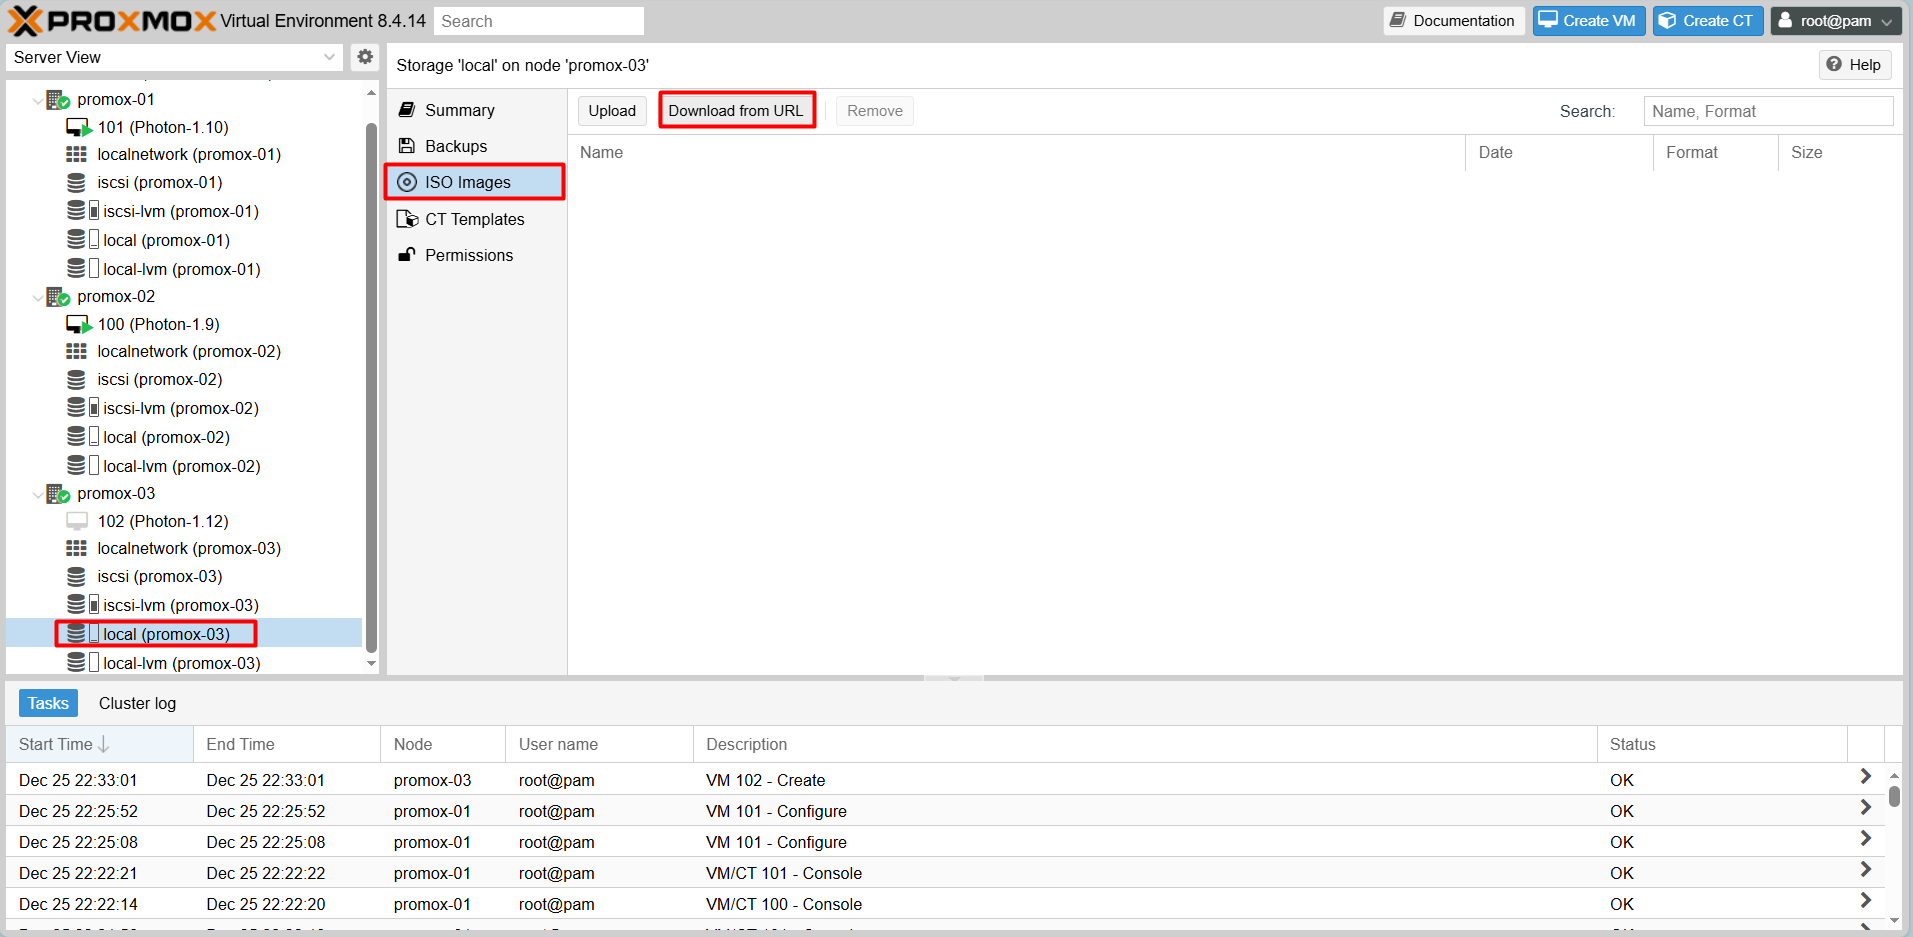
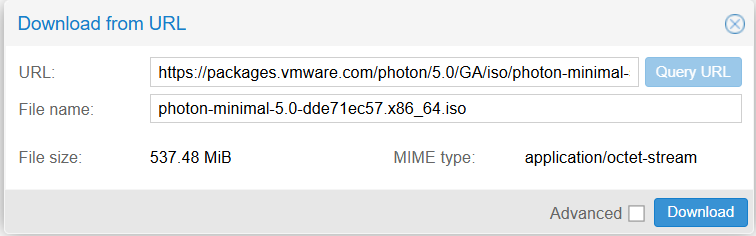
Deploying Test VM (Photon OS)
Download the Photon OS ISO directly to your Proxmox storage using the URL feature:
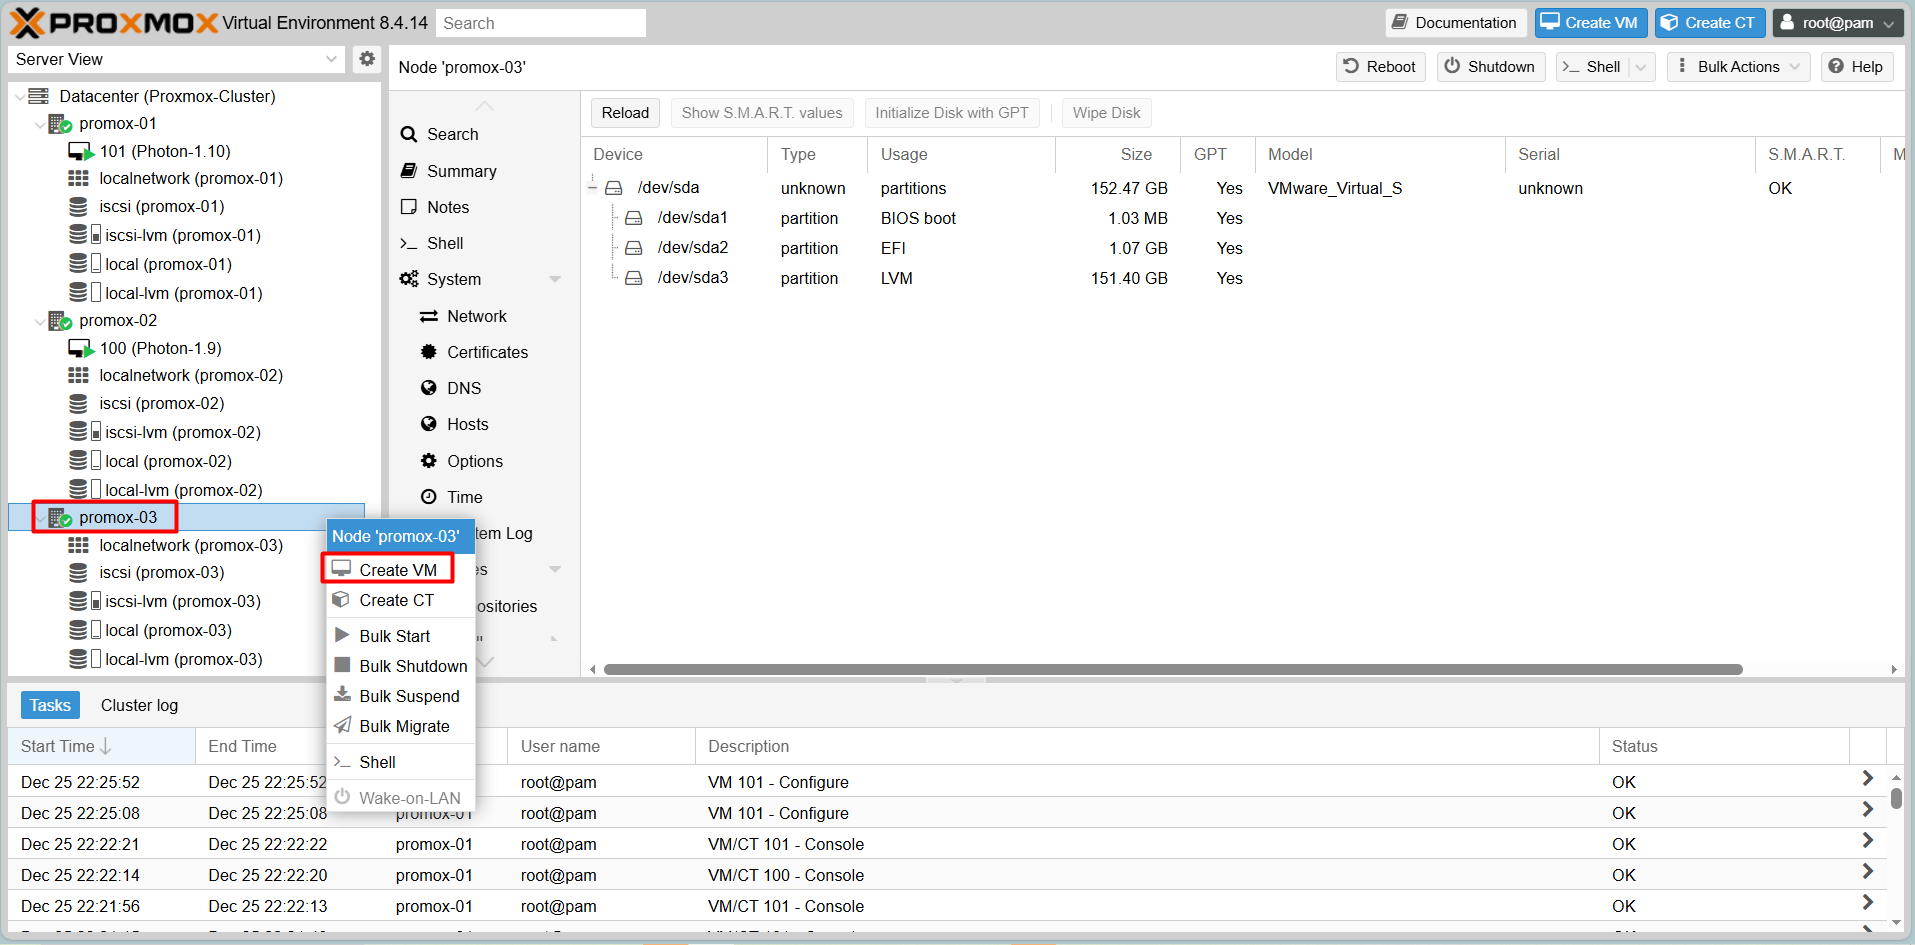
Step-by-Step Create VM
Step 1: Right click on Promox host need to create VM > Create VM
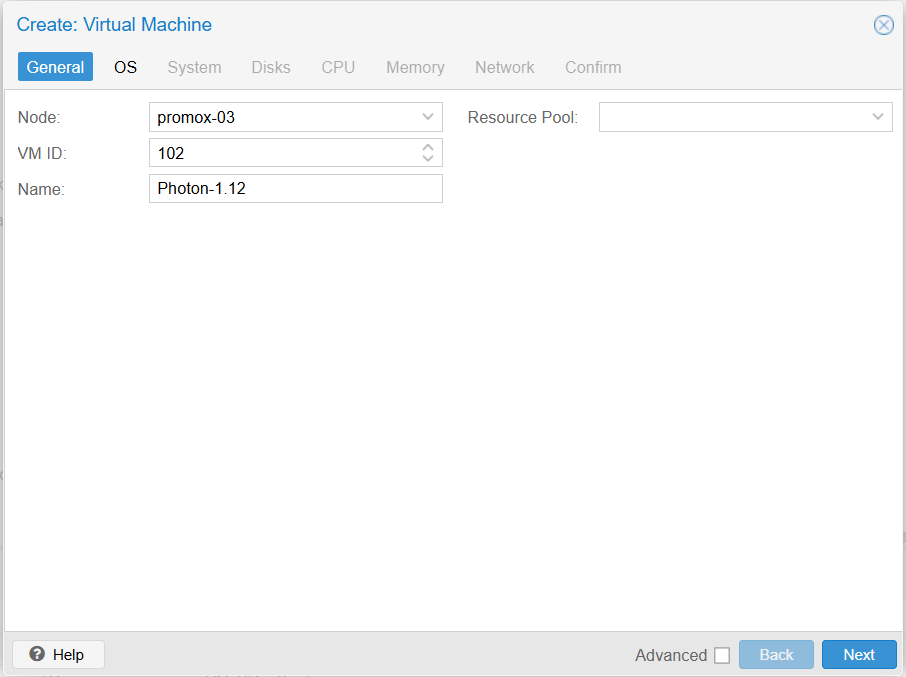
Step 2: General
Enter Name of VM
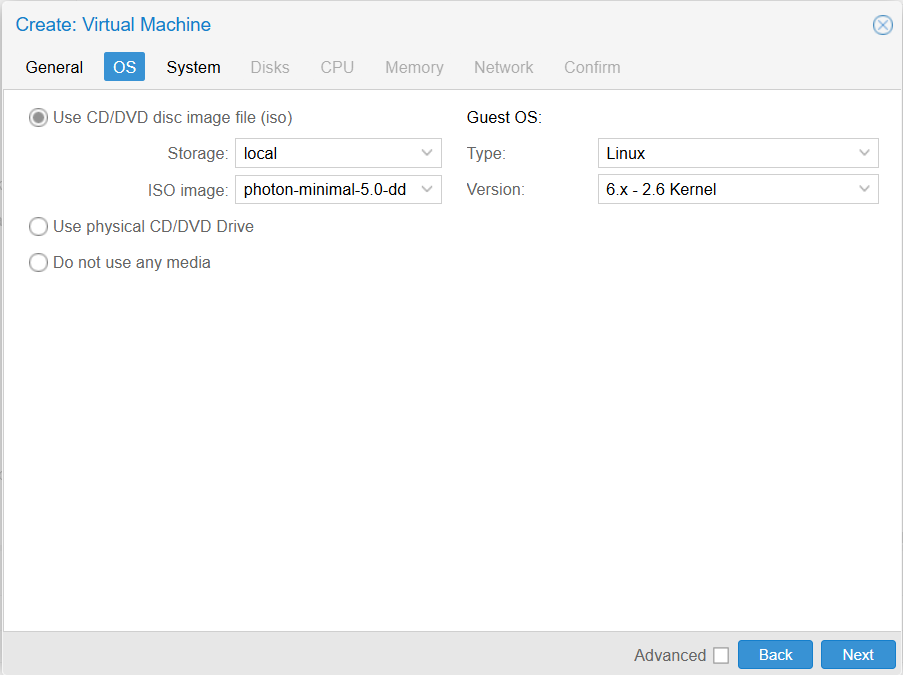
Step 3: OS
Step 4: System -> Next
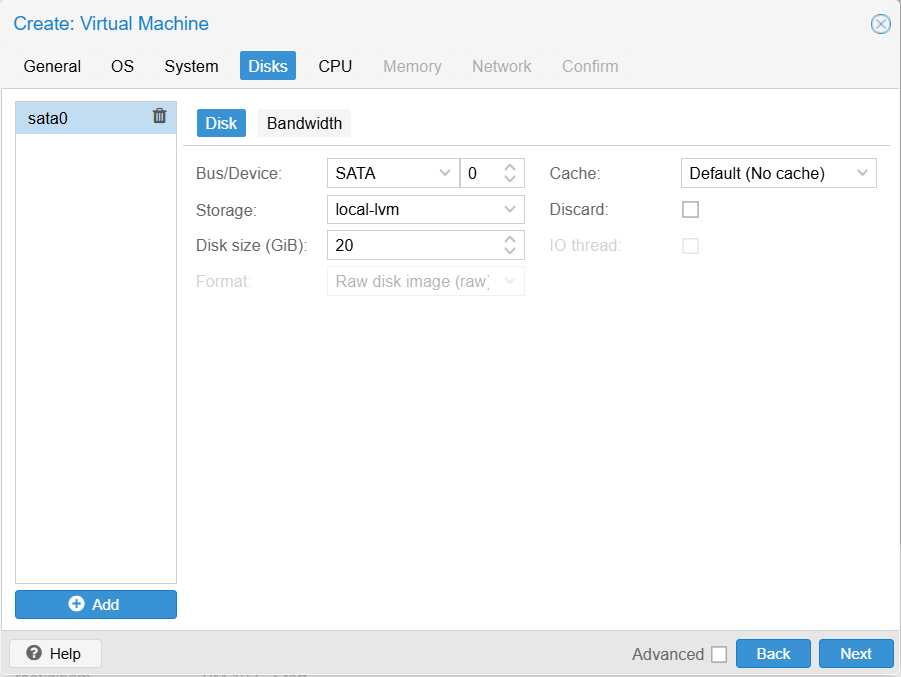
Step 5: Disk
Storage: local-lvm
Disk size (GiB): 20
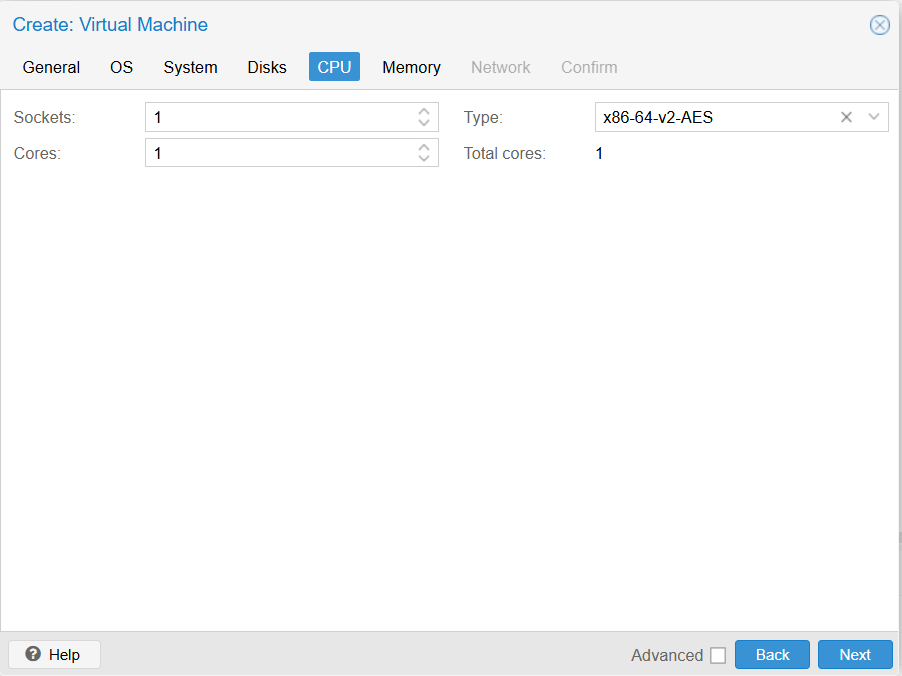
Step 6: CPU
Cores: 1
Configuration depends on usage needs
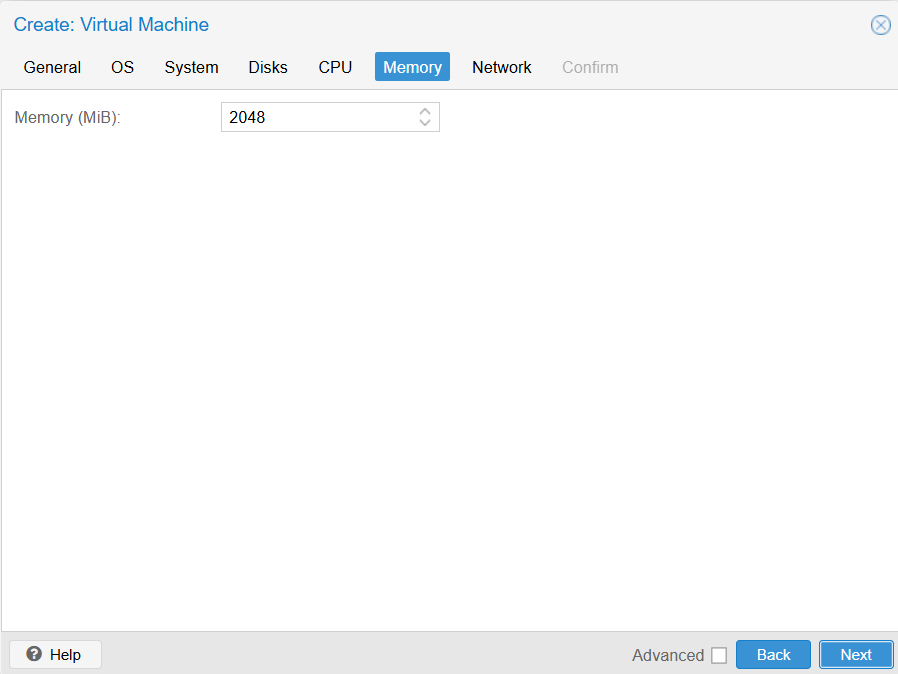
Step 7: Memory
Configuration depends on usage needs
Step 8: Network
Keep the configuration as shown in the picture

Step 9: Confirm and Create
Result
Install Photon
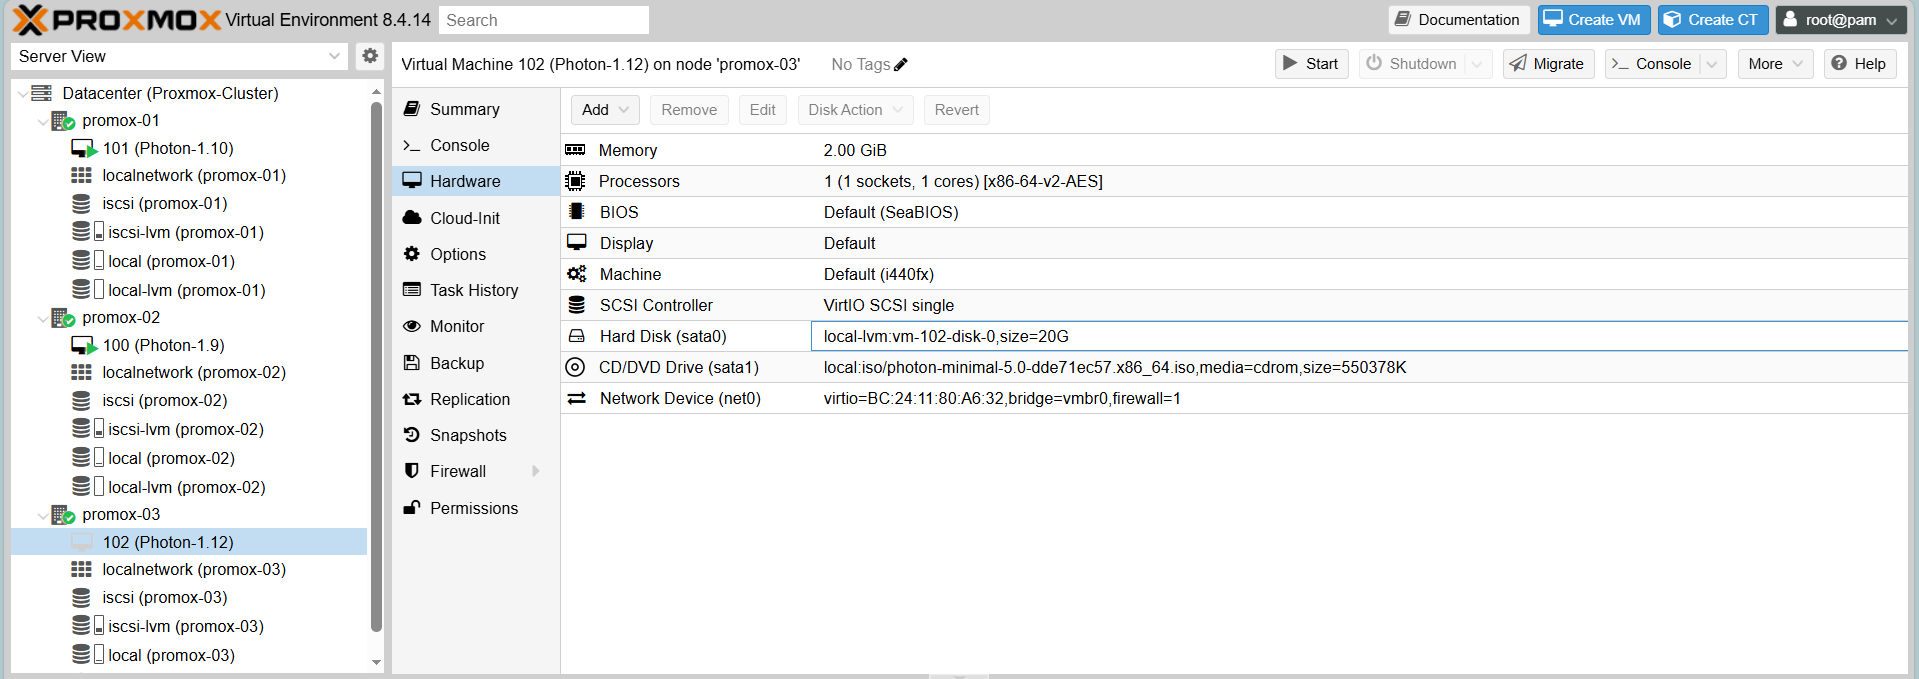
Create VMs (e.g., Photon-1.12 on Proxmox-03)
Create the VM with basic configuration, noting that Storage for the VM disk must be on Shared Storage (iscsi-lvm) to allow migration.
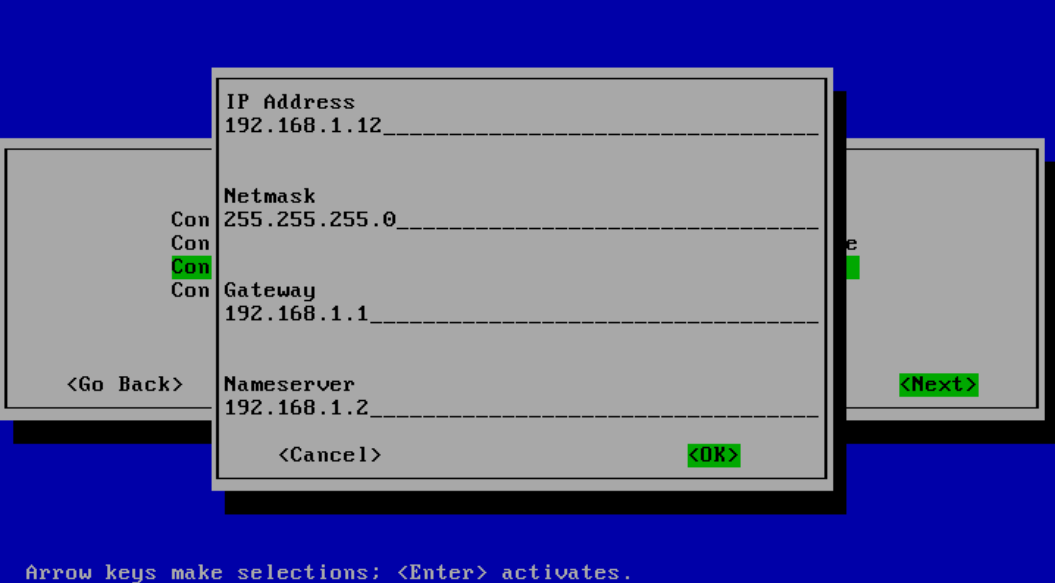
Network configuration for Photon OS after installation:
Netmask: 255.255.255.0
Gateway: 192.168.1.1
Nameserver: 192.168.1.2
Hostname: photon-1.12
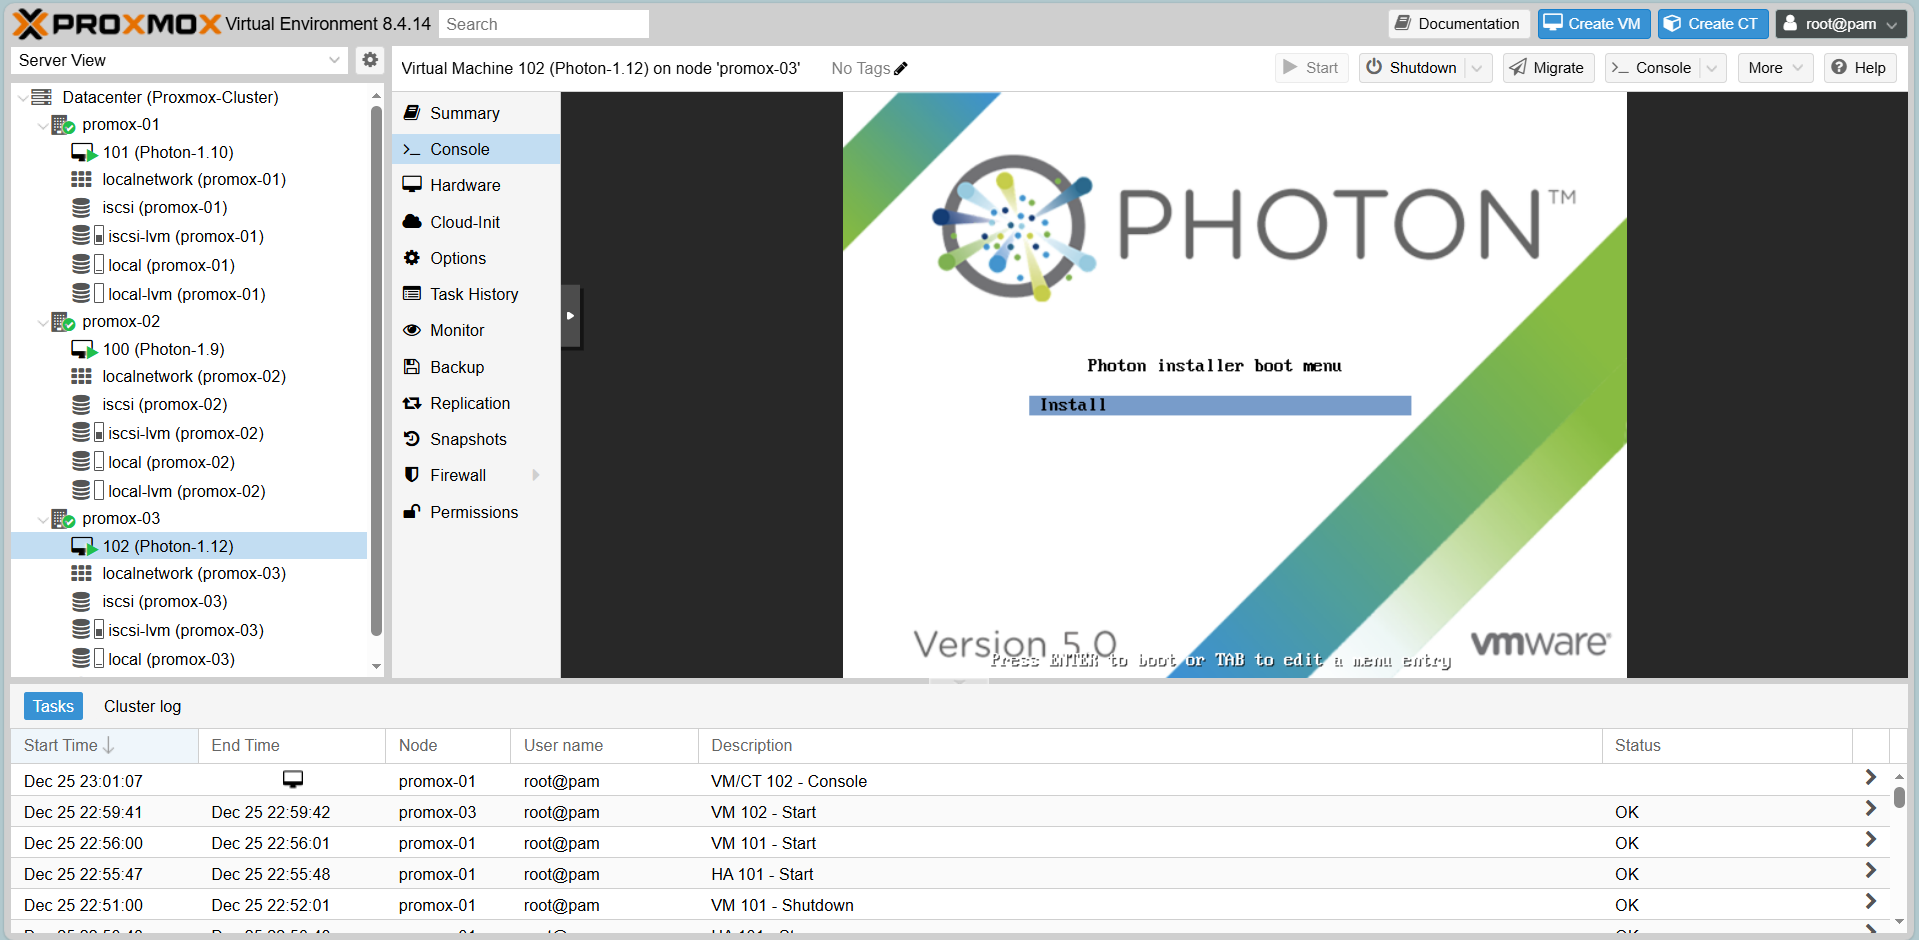
Step 1: Start Photon VM
Step 2: Select Console
Press ENTER to boot
Step 3: Next until configuring the network manually
Step 4: Next until enter Hostname
Enter Hostname: photon-1.12
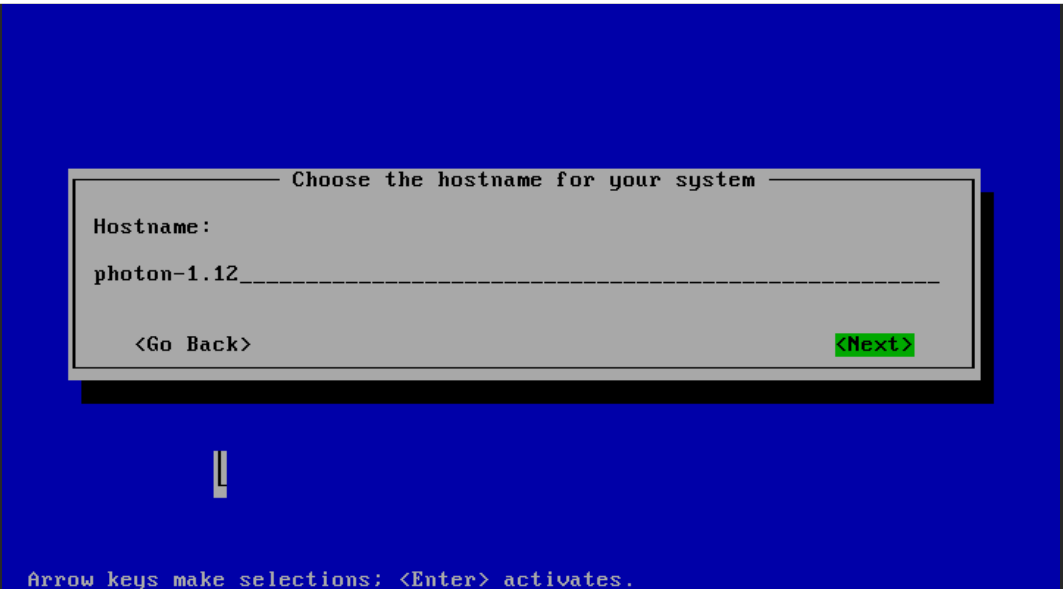
Step 5: Next and waiting for create photon-1.12
Create VMs (e.g., Photon-1.9 on Proxmox-02)
Network configuration for Photon OS after installation:
Netmask: 255.255.255.0
Gateway: 192.168.1.1
Nameserver: 192.168.1.2
Hostname: photon-1.9
Create VMs (e.g., Photon-1.10 on Proxmox-01)
Network configuration for Photon OS after installation:
Netmask: 255.255.255.0
Gateway: 192.168.1.1
Nameserver: 192.168.1.2
Hostname: photon-1.10
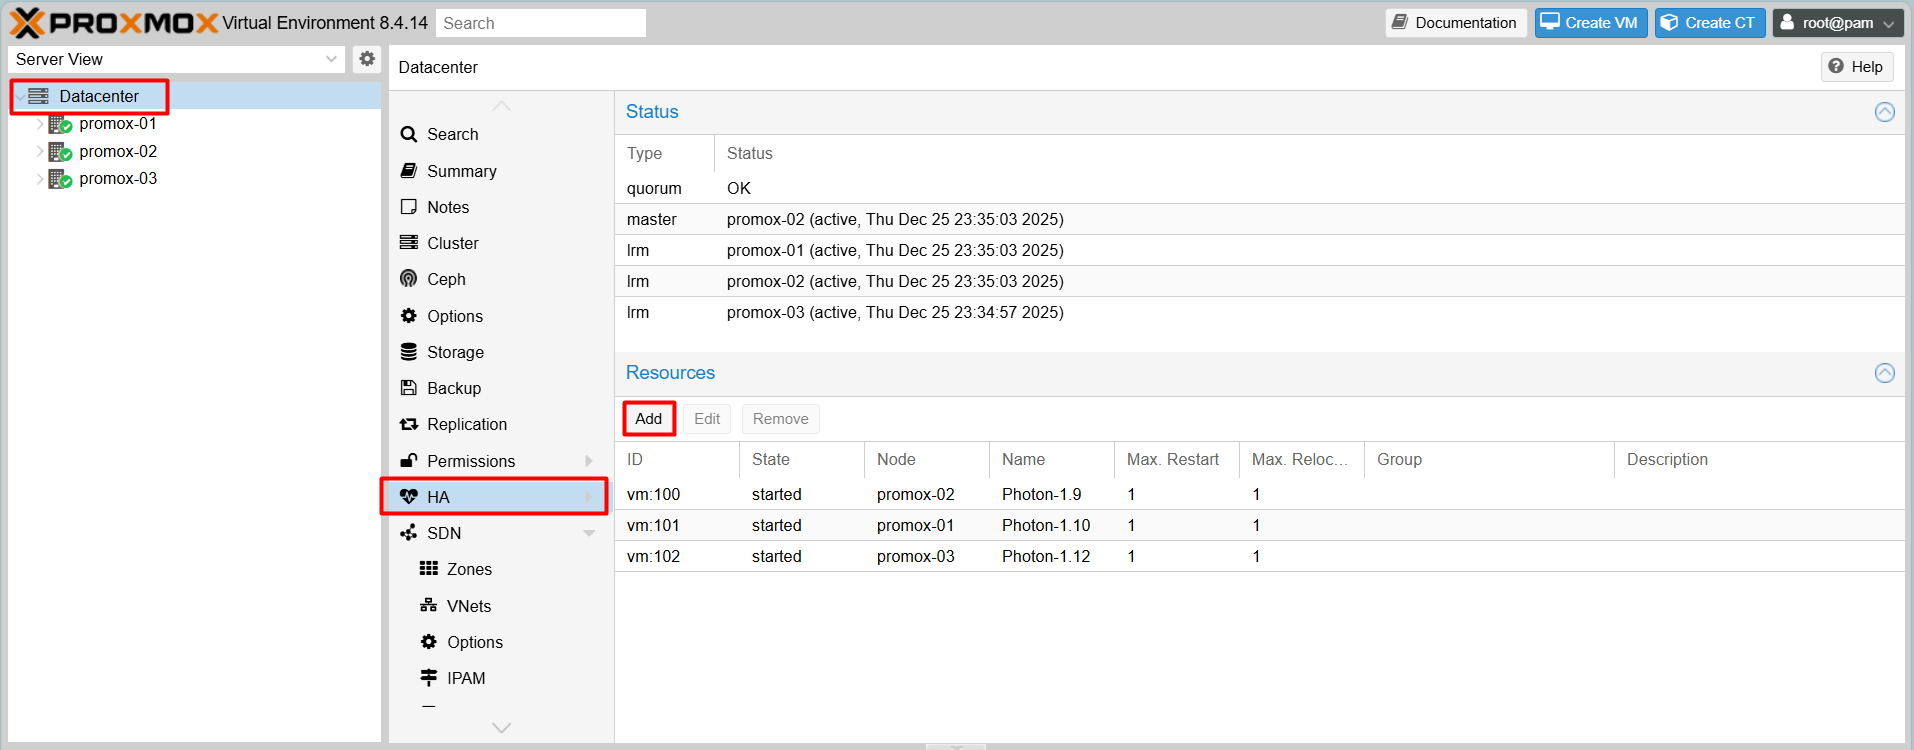
High Availability (HA) Failover
Step 1:Select Datacenter > HA > Add
Step 2: Add: Resource: Container/Virtual Machine
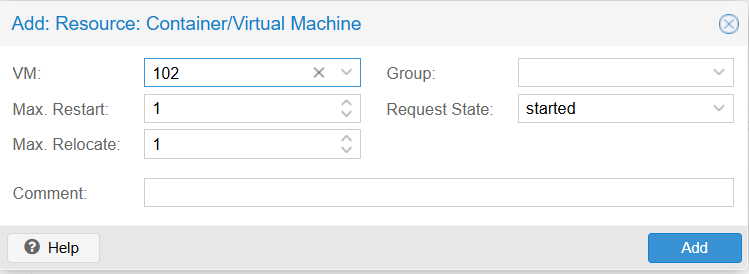
Max. Restart: 1
Max. Relocate: 1
Group: null
Request State: started
To configure, you need to clearly understand the parameters in the Add HA Resource:
Below is an explanation of the parameters when adding a Virtual Machine (VM) or Container (CT) to the Proxmox HA Manager:
- VM (Virtual Machine): The unique ID of the Virtual Machine or Container (LXC) you want to manage with HA. In this example, the ID is 102.
- Max. Restart (Number of restart attempts): The maximum number of attempts the system will make to restart the service on the same node if it crashes or fails. Once this limit is reached without success, the system will consider the start failed and may proceed to relocate the service.
- Max. Relocate (Number of relocation attempts): The maximum number of attempts the system will make to migrate (relocate) the service to another node in the cluster if the current node fails or the service cannot be started. This prevents the service from bouncing indefinitely between failing nodes.
- Group: The HA Group to which this resource belongs. HA Groups define specific nodes and priorities for running the VM. If left empty, the VM can run on any available node in the cluster.
- Request State (Desired state):The desired state that the HA Manager will enforce for this resource.
started: The HA Manager will ensure the VM is always running. If it stops, the system will attempt to start it again.stopped: The HA Manager will ensure the VM stays powered off (useful for maintenance).disabled: HA management is suspended for this resource (configuration remains).ignored: The HA Manager puts the resource in an unmanaged state.
Comment: A text field for adding optional notes or descriptions regarding this resource.
Add other virtual machines to HA sequentially
Result
Scenario 1: High Availability (HA) Failover
Goal: When a node dies, the VM must restart on another node.
Action: Simulate a failure by pulling the power plug or forcing a shutdown of Proxmox-03

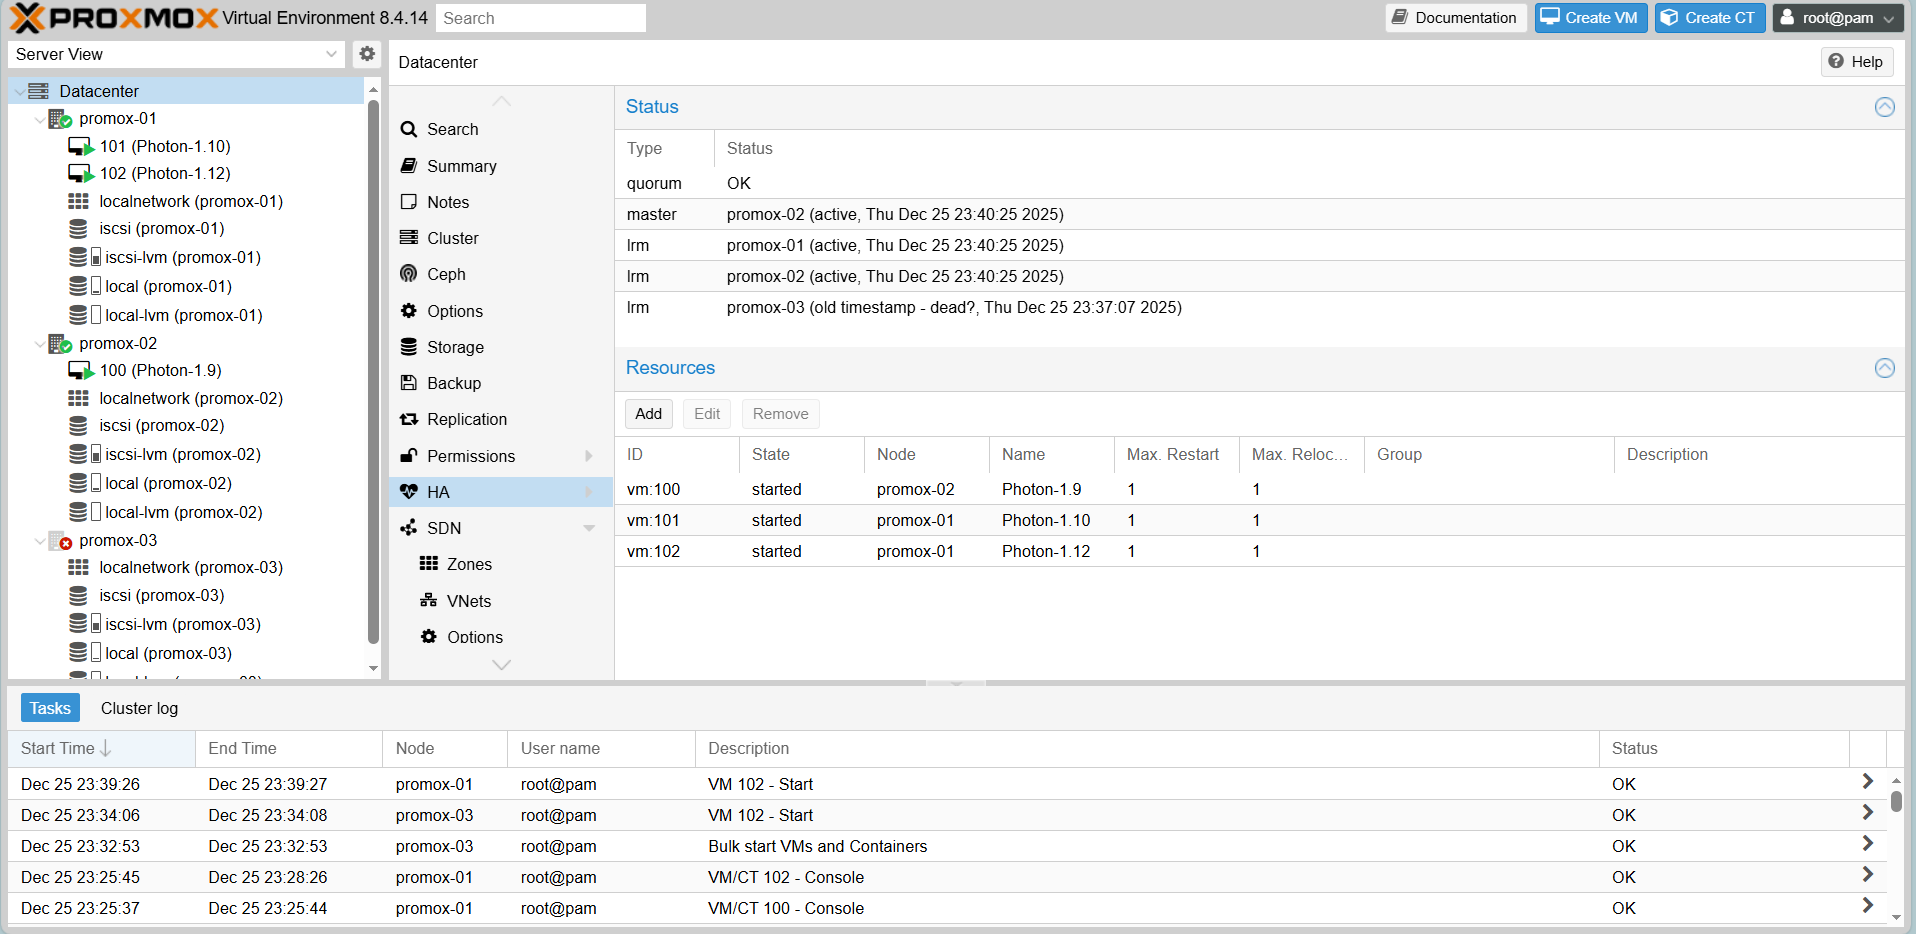
When you go back to the web portal interface, Proxmox-03 will be loading.
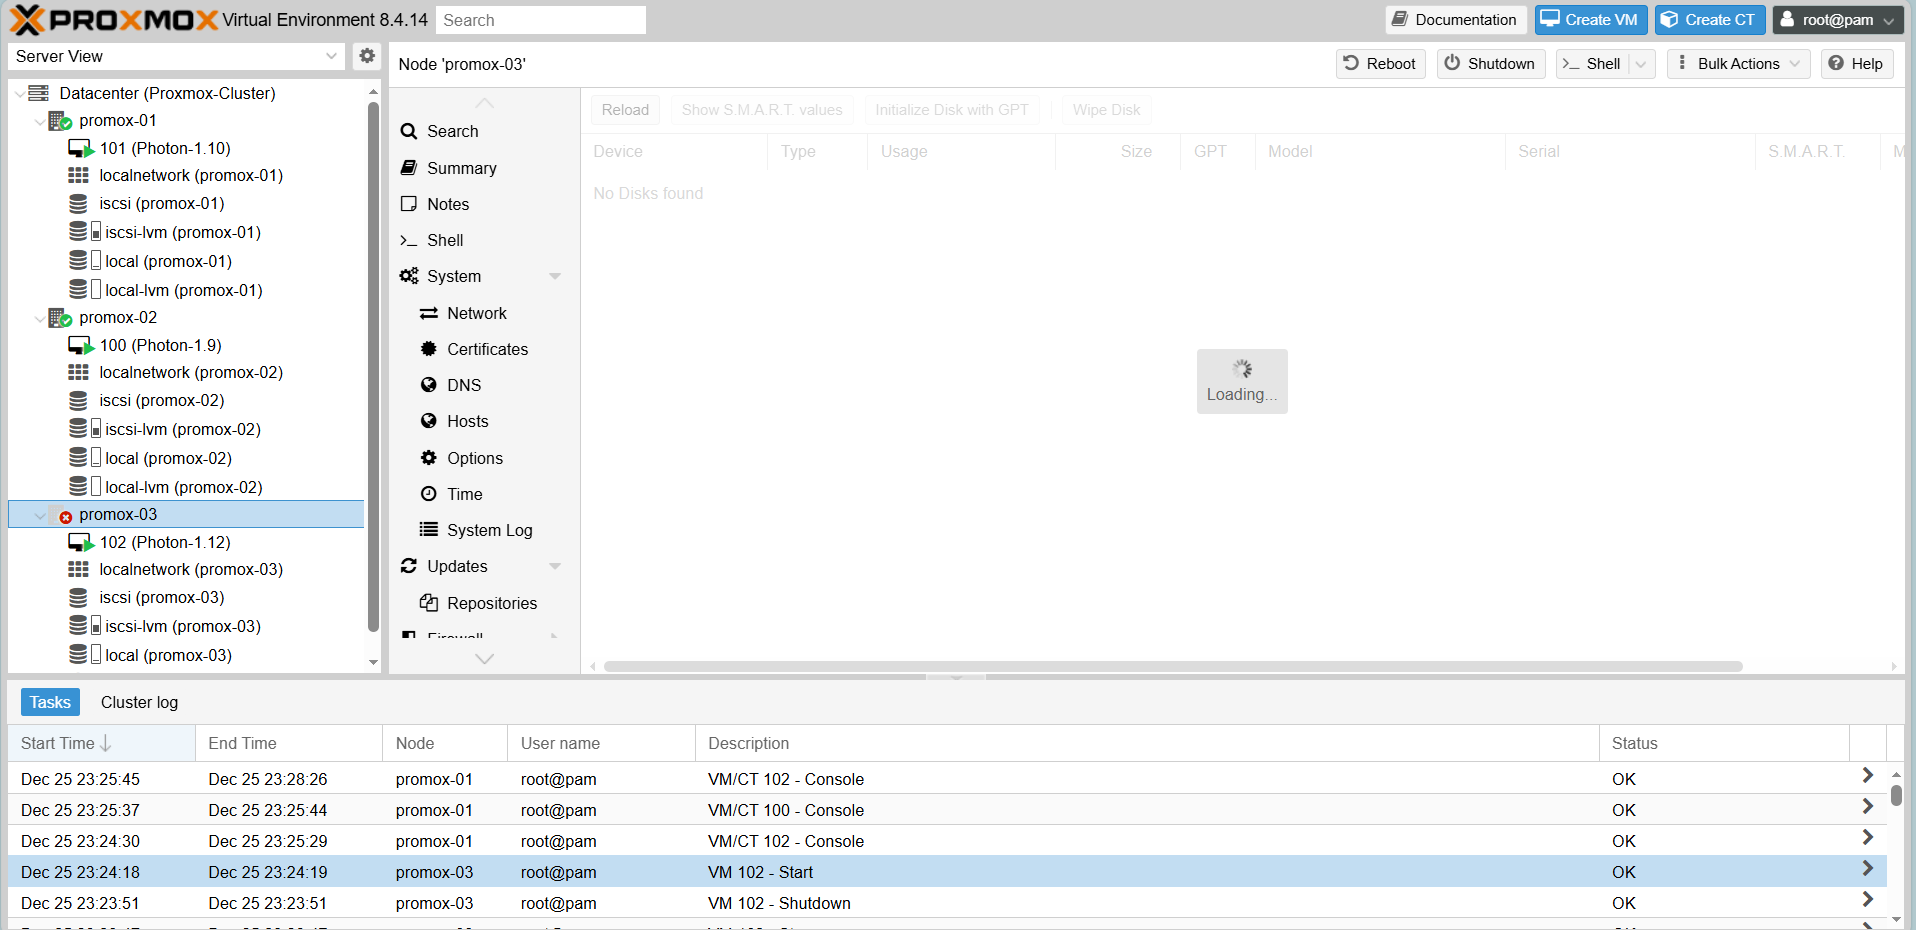
Result:
- Proxmox-03 shows as Offline (Red cross).
- HA Status for VM 102 enters
fencestate.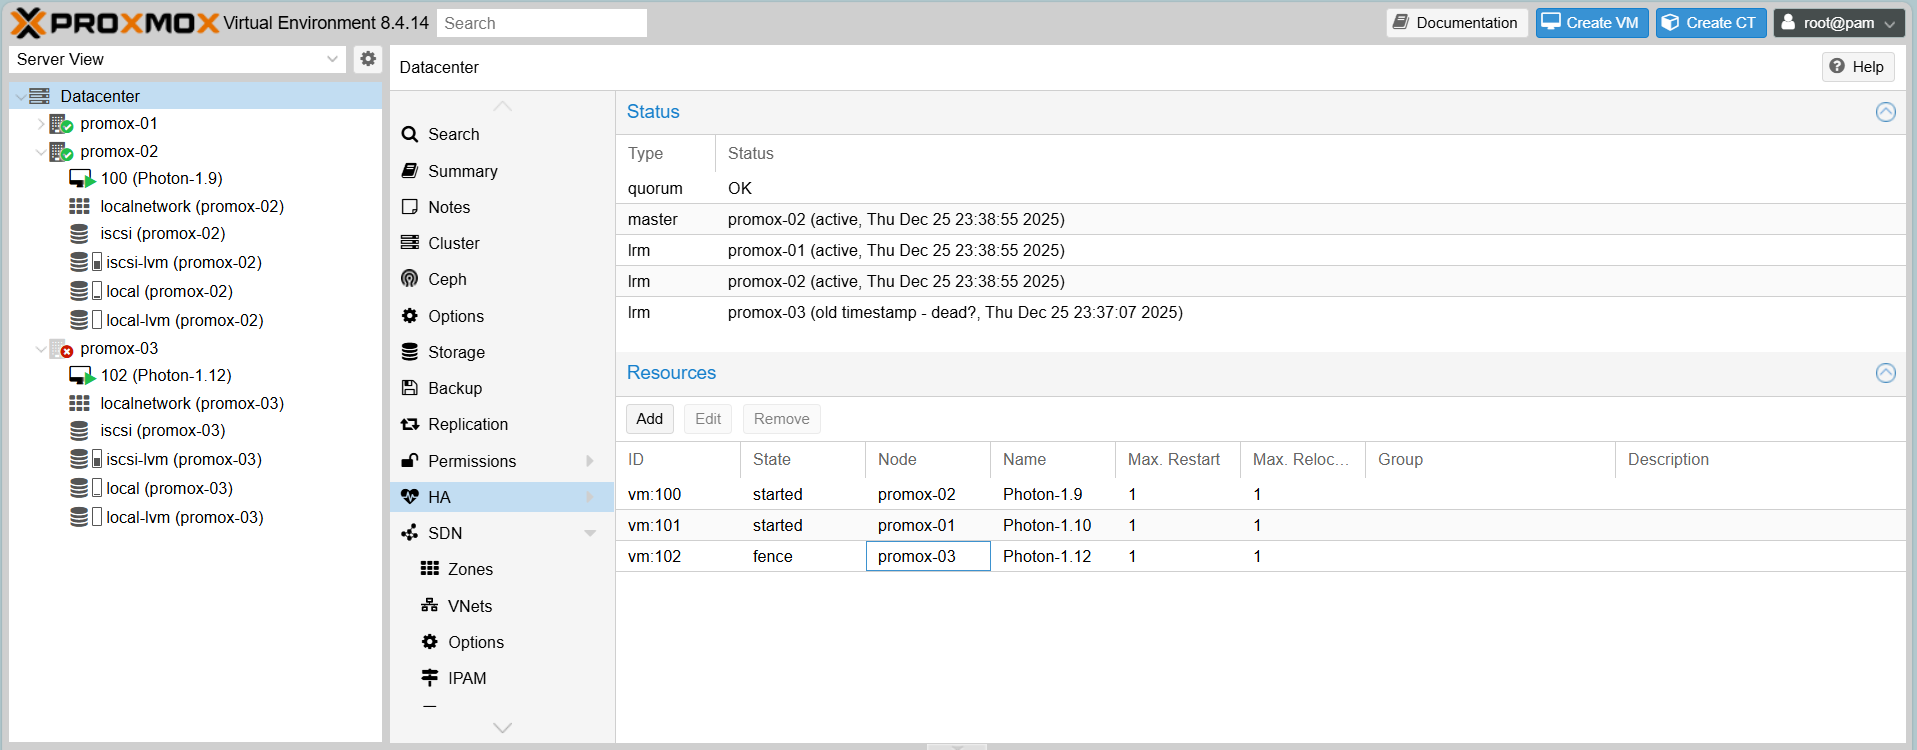
- After a brief moment, VM 102 automatically restarts on Proxmox-01 or Proxmox-02.
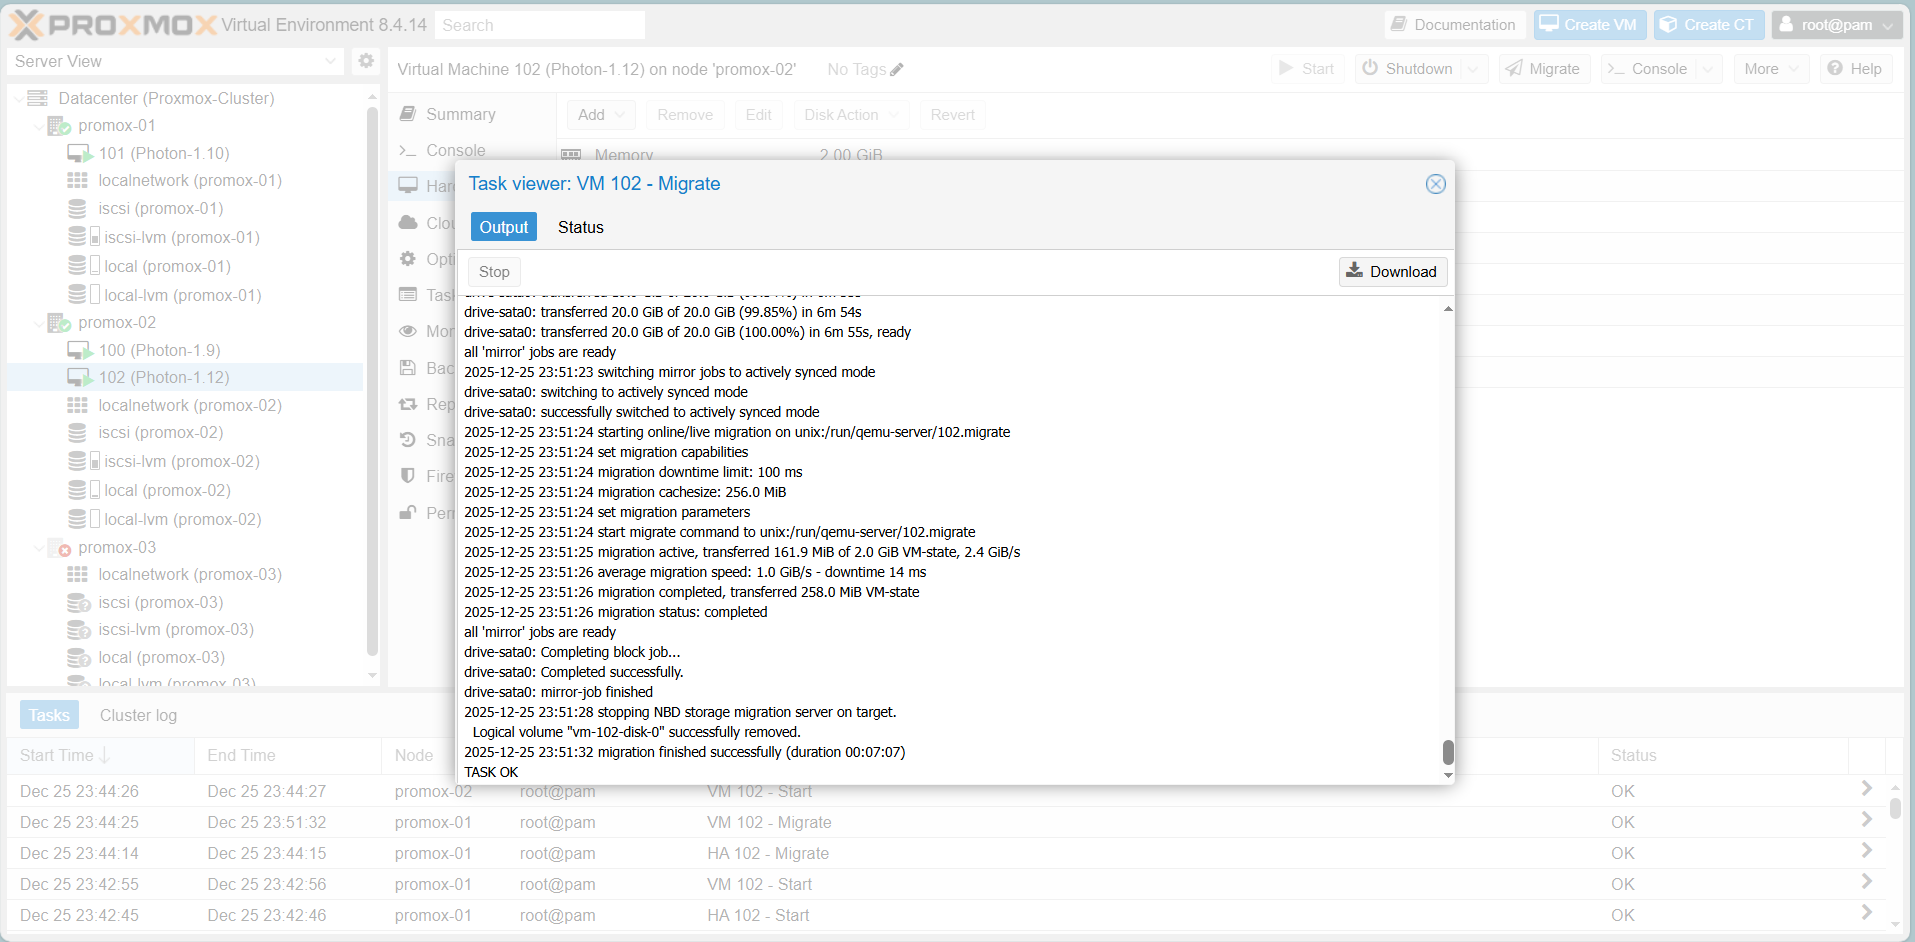
Scenario 2: Live Migration
Proxmox Live Migration:
Function: Moves running VMs from one cluster node to another without stopping them.
Benefit: Enables zero-downtime server maintenance and dynamic load balancing.
Mechanism: Transfers memory content in real-time while preserving network connections.
Goal: Move a running VM to another node without causing service interruption.
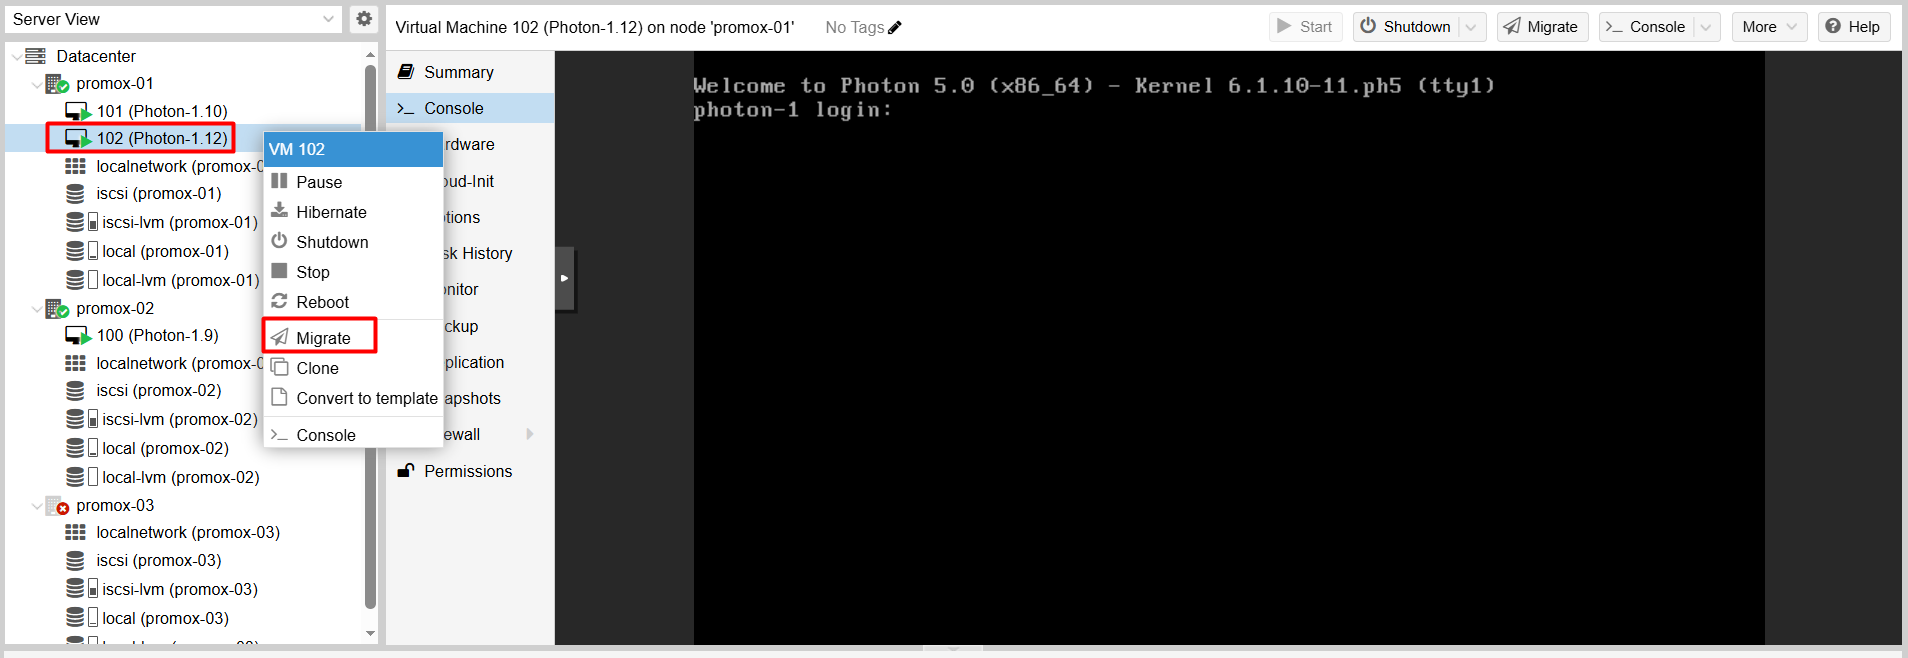
Step 1:
Right-click the running VM (VM 102).
Select Migrate.
Step 2:
Choose the Target Node (e.g., Proxmox-02).
Click Migrate.
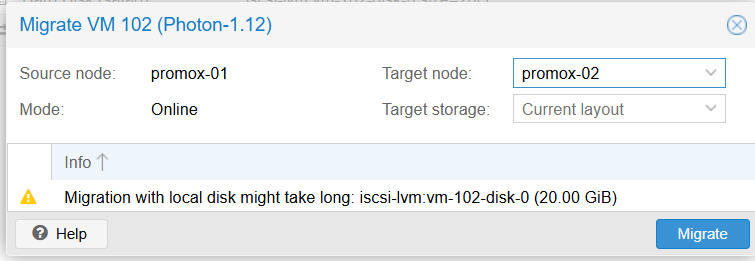
Result: The task log shows Task OK, and the VM is now running on the new node without the OS shutting down.
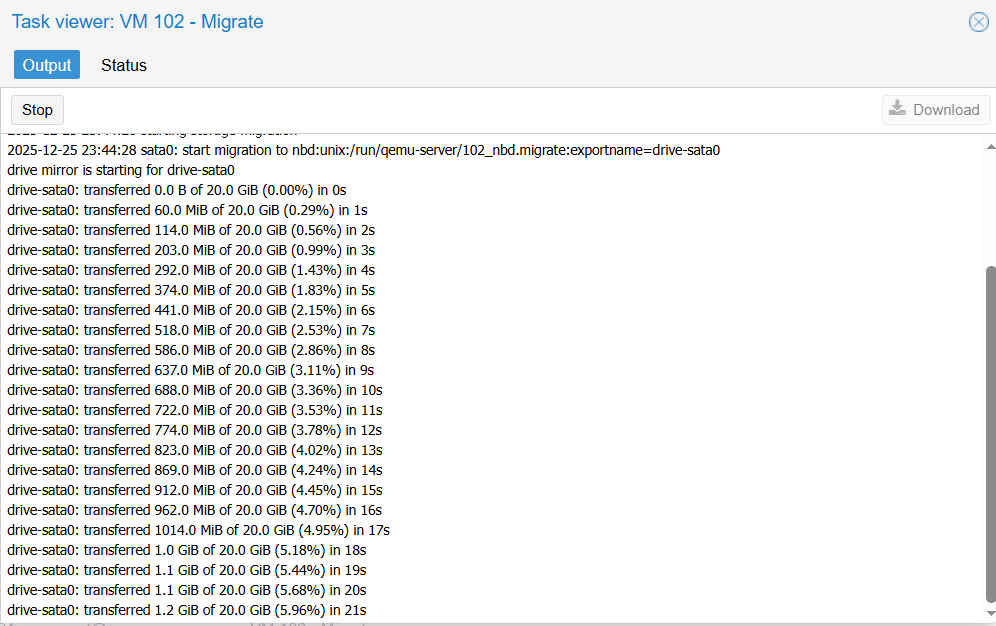
Wait for the task to run a bit, you will receive the following results